1. Introduction
Customer Portal Display Settings enable you to control when shipments are marked as completed, affecting their visibility in the portal's list view. This manual explains the default rules, how to manually mark shipments as complete, and how to adjust the completion timeframe to suit your needs.
2. Understanding Completed Shipments and Adjust the Completion Timeframe
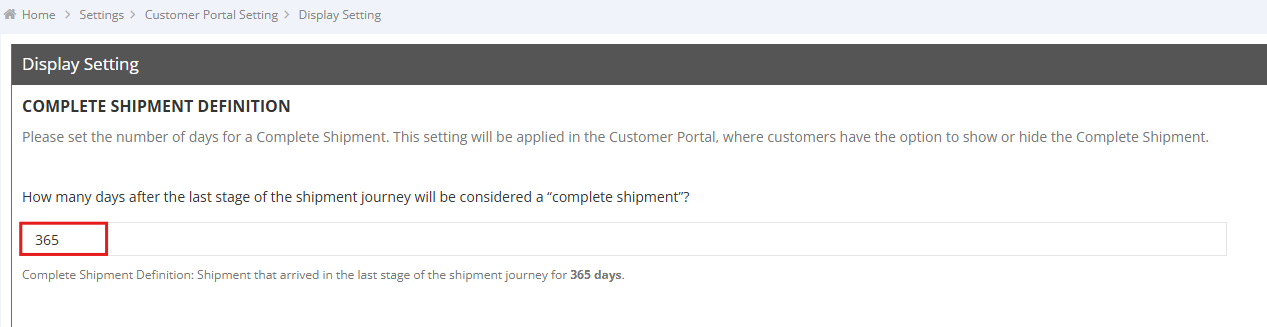
By default, a shipment is considered completed 45 days after reaching its final stage.
- For example, in CY-to-CY shipments, the final stage is "Unloaded from Vessel," and the shipment will be marked as complete 45 days after this stage.
If the default 45 days does not meet your needs, you can adjust the completion timeframe:
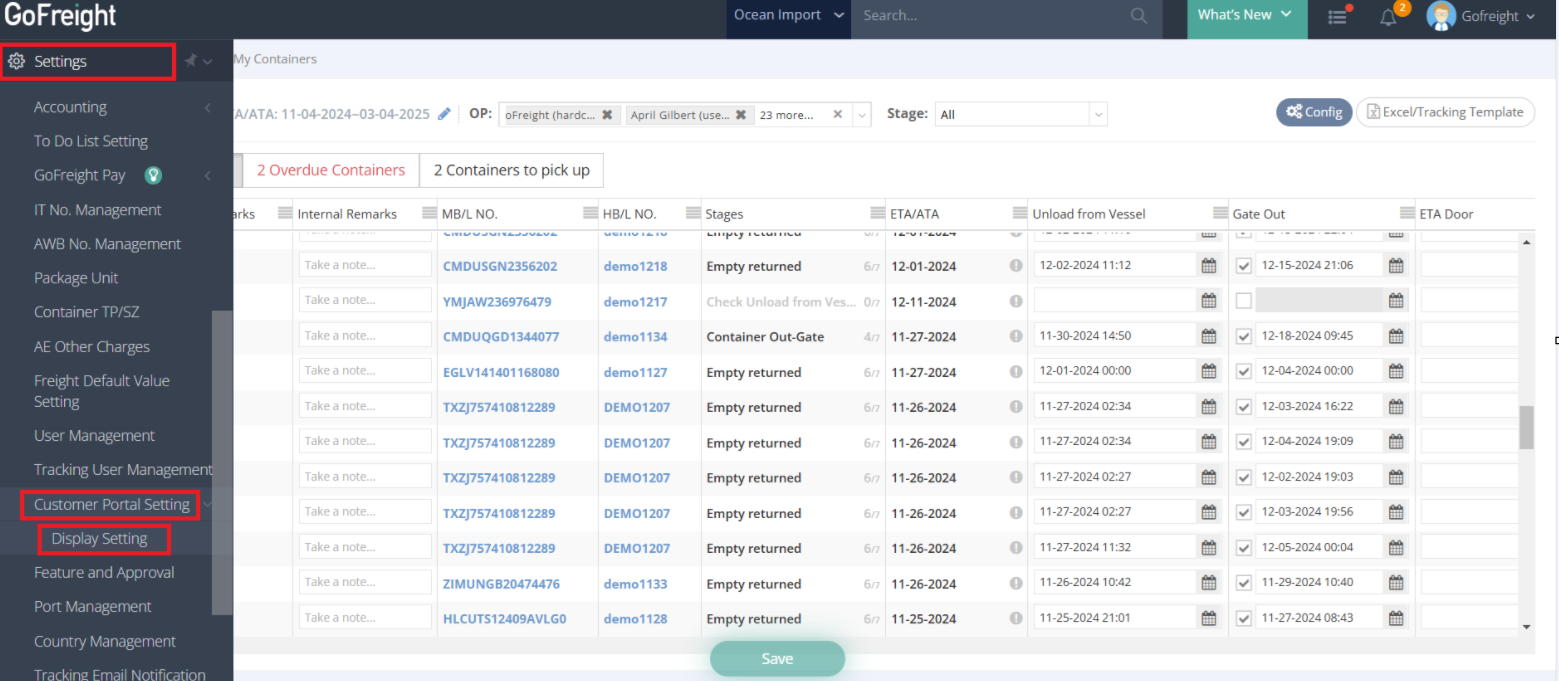
- Go to GoFreight Settings and navigate to Display Setting under Customer Portal Settings.
- In the Completion Period field, enter the number of days after the final stage for a shipment to be marked as complete (e.g., change 45 days to 14 days).
- Click Save to apply the changes.
3. Marking Shipments as Complete
In addition to the default setting of marking a shipment as complete 45 days after its final stage, you can manually mark shipments as complete or customize the completion timeframe to fit your needs.
Manually Mark Shipments as Complete
Option 1: Mark as Complete in Container Details
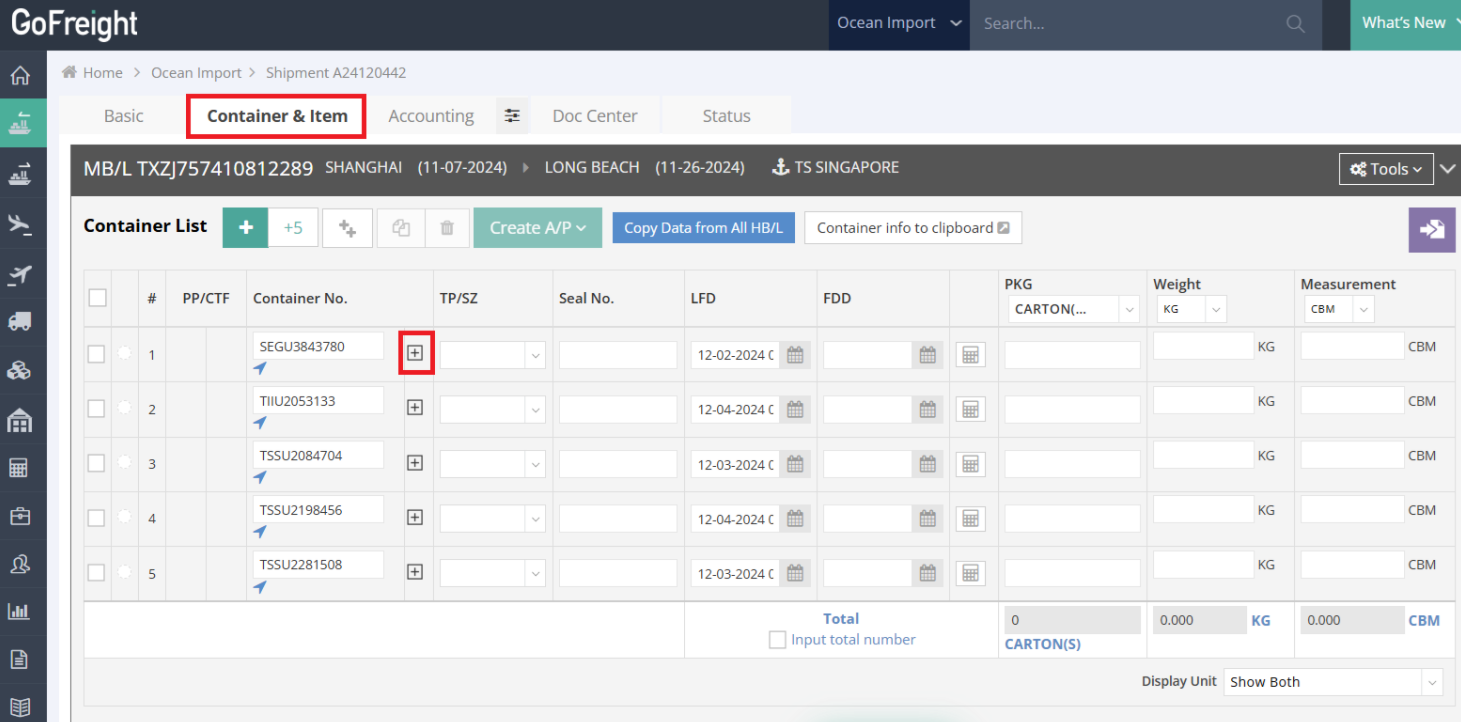
- Navigate to the Shipment Page and go to the Container and Item Tab (next to Basic).
- Click the Plus Sign (+) next to the container number to expand container details.
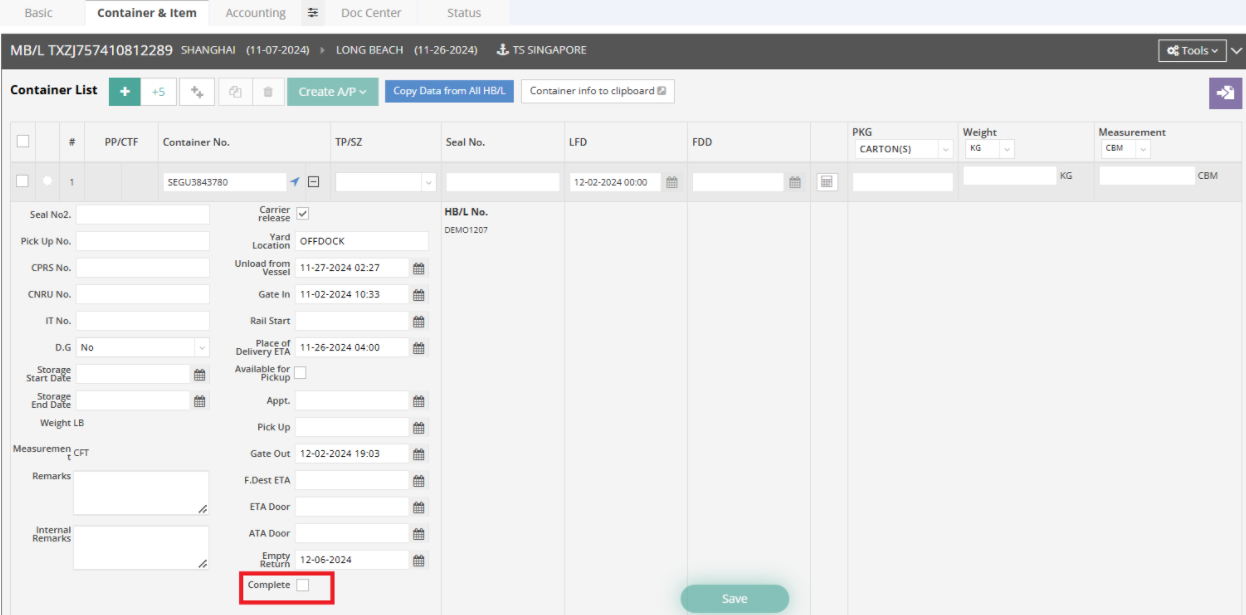
- At the bottom of the container details, check the Complete box.
- Click Save to mark the container as complete, which will immediately hide it from the Customer Portal.
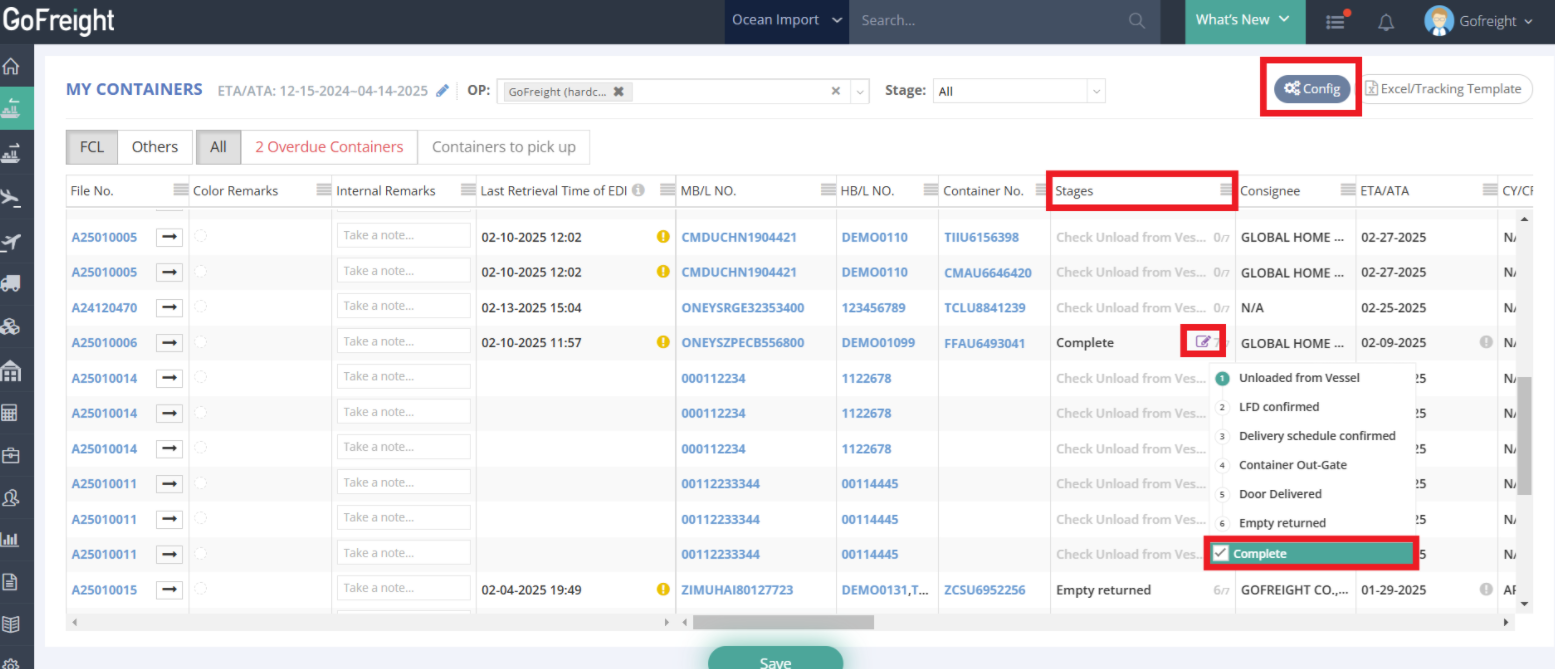
Option 2: Mark as Complete in My Containers View
- Navigate to the My Containers view.
- Configure Stage as a visible column by clicking Config in the top-right corner.
- Locate the shipment and click the pencil icon next to the displayed stage.
- Tick the Complete box to mark the shipment as complete.
4. How to display Completed Shipments on the Customer Portal
The Customer Portal allows you to control the visibility of completed shipments based on your preferences. You can choose to display or hide completed shipments by adjusting the settings.
-
Configure and Filter Settings:
- Click Filter in the top-right corner of the Customer Portal.
- Locate the filter labeled Display Complete Shipment.
- Hiding Completed Shipments:
- Set the Display Complete Shipment filter to No to hide completed shipments from the portal.
- Once hidden, completed shipments will no longer appear in the Customer Portal view.
- Displaying Completed Shipments:
- Set the Display Complete Shipment filter to Yes to show completed shipments in the portal.
- The completed shipments will be displayed in the list view.
- Hiding Completed Shipments:

5. Final Notes
- Ensure all settings are saved to reflect the changes.
- For further assistance, please contact Customer Support.
For a visual guide on this feature, please refer to the following videos: