Who Has Access to Create AP Invoices (Accounts Payable Invoices)
By default, only the General Manager, Operation Manager, Operation, Accounting Manager, and users with the Accounting role have access. Users in other roles can access this feature if approved by an Admin or General Manager. GoFreight support agents can also grant access, with or without modifying the user’s role.
Invoice-Based vs. Billing-Based Modes
In GoFreight, there are two invoice modes: Invoice Based and Billing Based. By default, the system is set to Invoice-Based mode.
The Billing Based mode is primarily used in China due to specific billing and reimbursement practices. If you need to use the Billing Based mode, please contact the GoFreight Support Team to have it enabled.
The following steps demonstrate how to create AP(Accounts Payable) Invoices in the Accounting tab of a shipment file.
Steps to Create AP Invoices for Your Shipment:
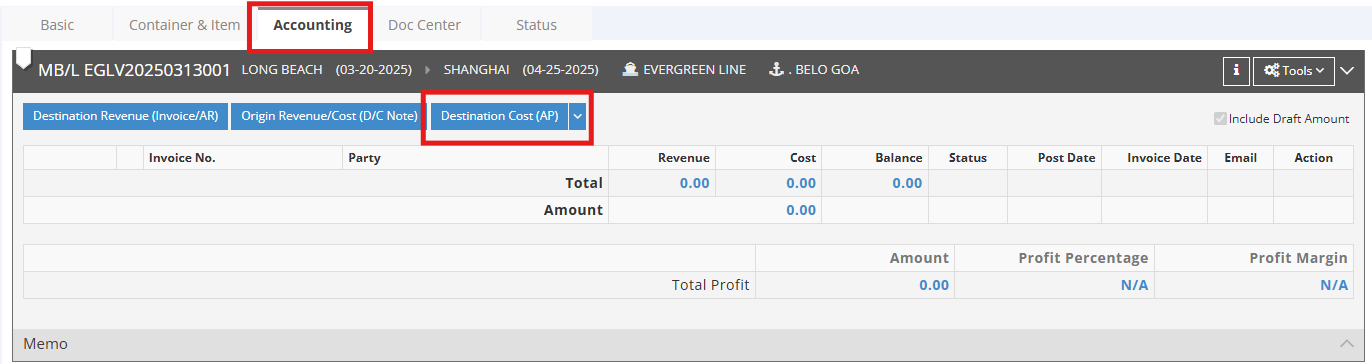
- Navigate to the shipment and click on the "Accounting" tab. Then select “Destination Cost (AP).”
Note: We recommend creating AP invoices at the Master B/L (MBL) level for the following reasons:
- Centralized cost management: Charges from vendors, such as carriers or co-loaders, are typically issued at the MBL level, making it more efficient to manage and reconcile costs.
-
Charge allocation on the MBL level will be split: If you create an AP invoice at the Master B/L (MBL) level and the MBL contains multiple HBLs, the invoice amount will be distributed to each HBL based on the volume (CBM) ratio.
However, the system does not restrict you from creating AP invoices at the HBL level. You may choose the appropriate level based on your actual business needs.
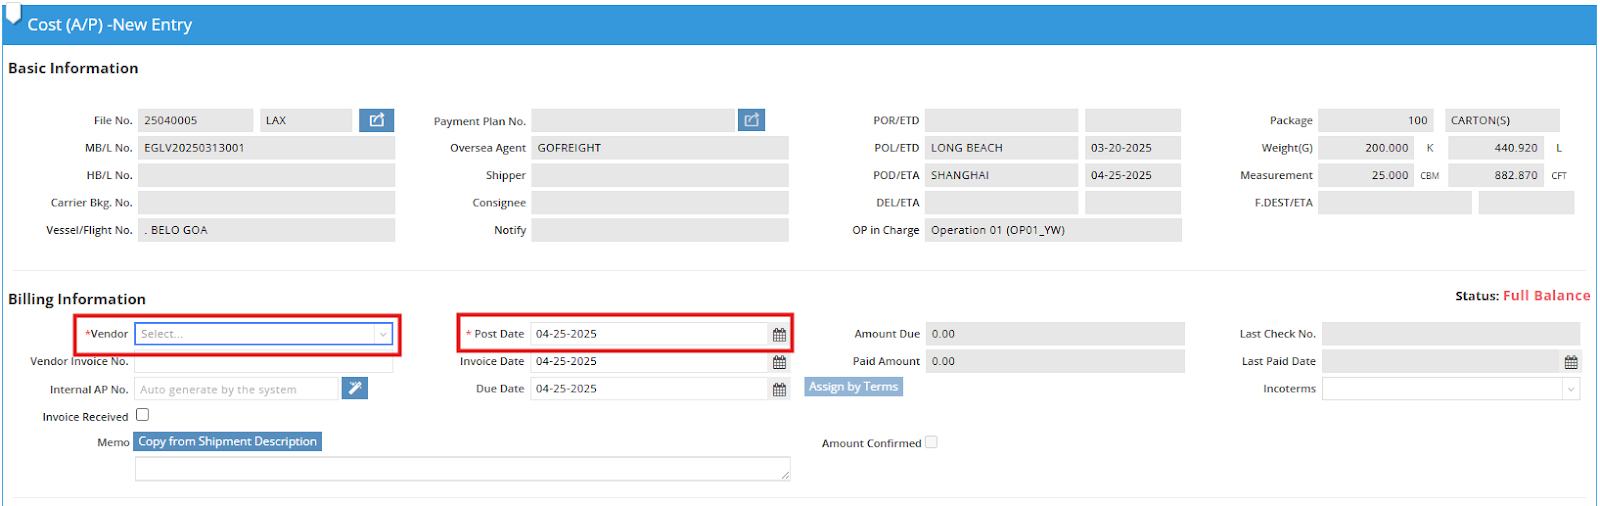
- Select a Trade Partner in the Vendor field. The "Post Date" will be automatically populated based on your system settings.
- Click the green “+” button to add a new billing item, and enter the Rate amount.
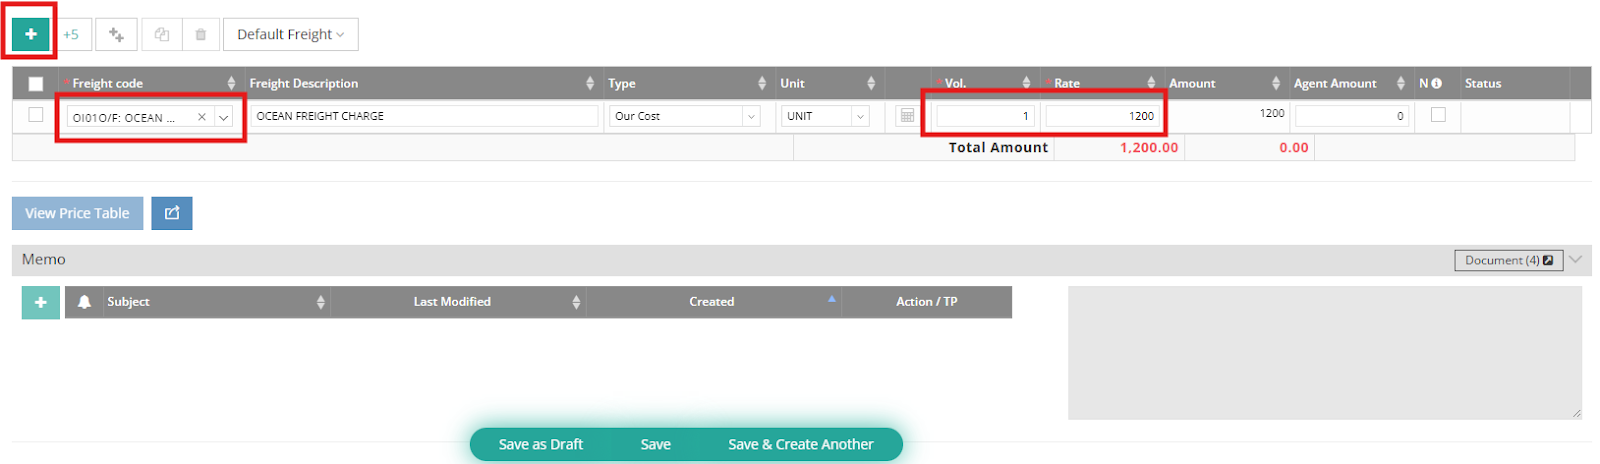
- Click Save to save the invoice. If you want to create another invoice right after, click Save & Create Another.
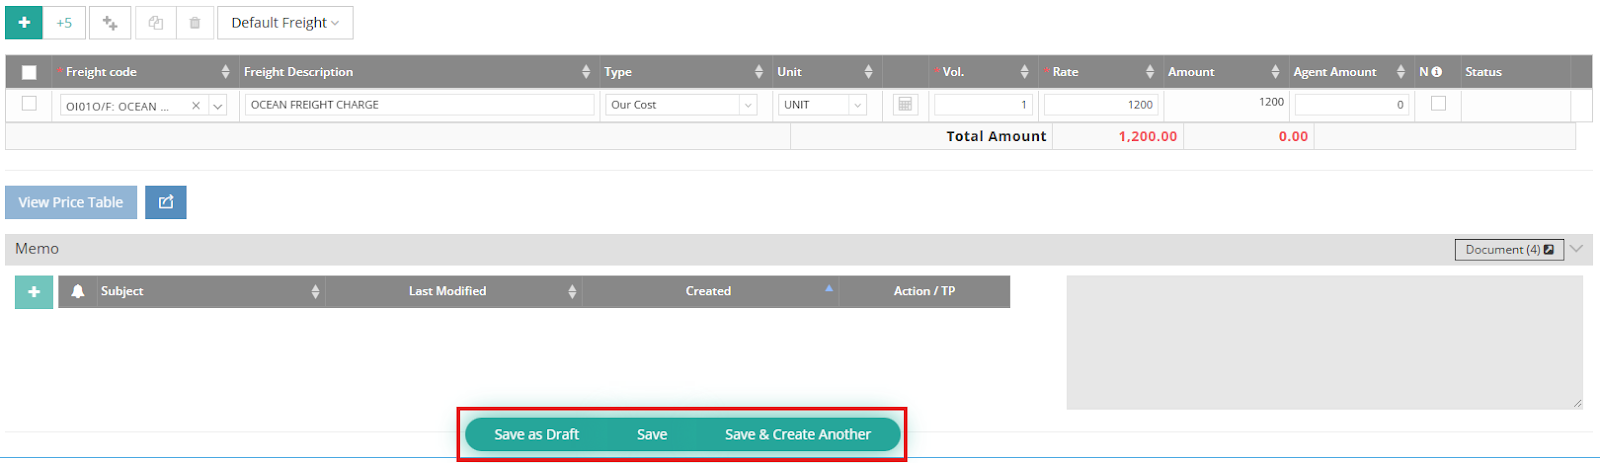
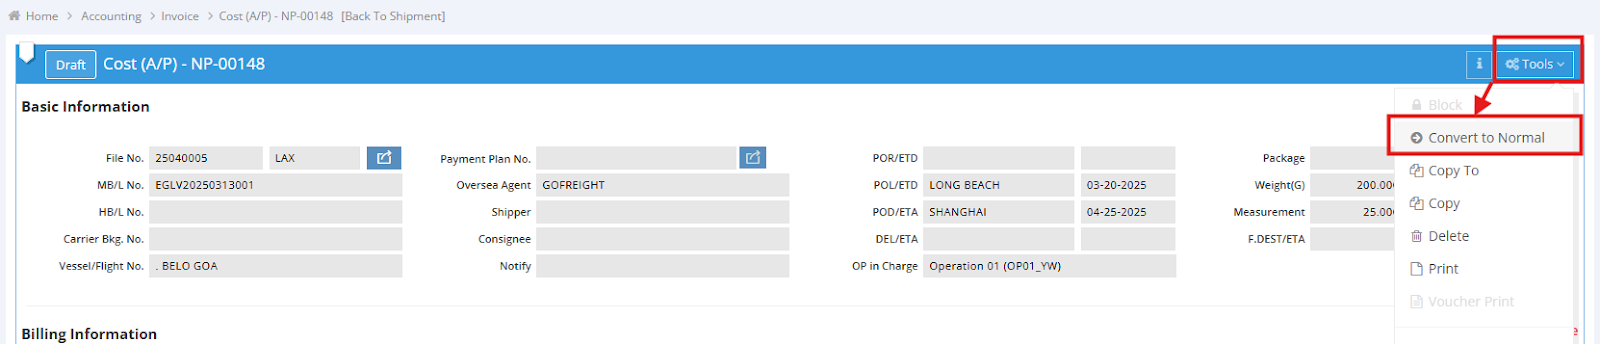
Note: If the invoice details are not yet finalized, you can click Save as Draft to save it as a draft. After saving, you will be directed back to the Accounting tab, where you can see the invoice status marked as "Draft".
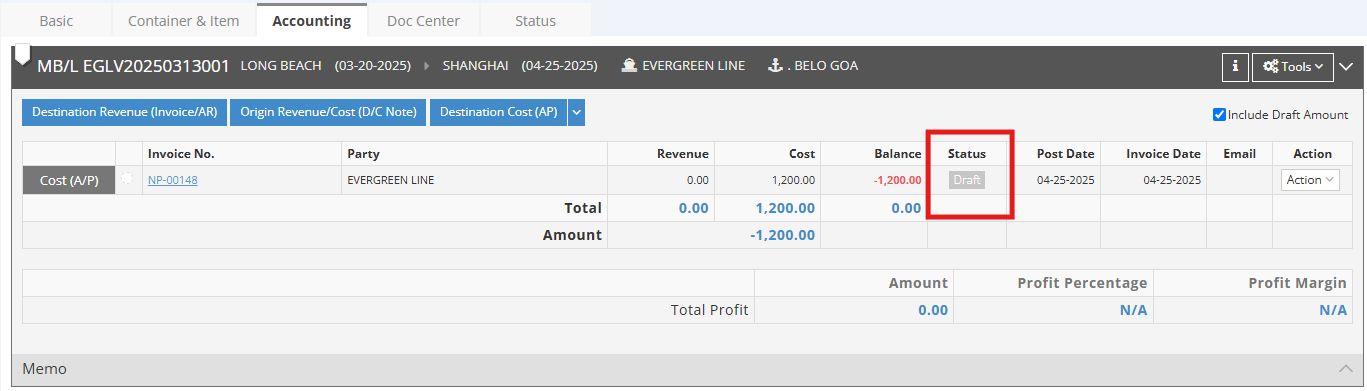
To convert an invoice from Draft to Normal status, go to the invoice entry page and select Convert to Normal from the Tools menu at the top right corner.