Who Has Access to Create AR Invoices (Accounts Receivable Invoices)
By default, only the General Manager, Operation Manager, Operation, Accounting Manager, and users with the Accounting role have access. Users in other roles can access this feature if approved by an Admin or General Manager. GoFreight support agents can also grant access, with or without modifying the user’s role.
Invoice-Based vs. Billing-Based Modes
In GoFreight, there are two invoice modes: Invoice Based and Billing Based. By default, the system is set to Invoice-Based mode.
The Billing Based mode is primarily used in China due to specific billing and reimbursement practices. If you need to use the Billing Based mode, please contact the GoFreight Support Team to have it enabled.
The following steps demonstrate how to create AR (Accounts Receivable) Invoices in the Accounting tab of a shipment file.
Steps to Create AR Invoices for Your Shipment:
- Navigate to the Shipment and click on the "Accounting" tab, then select “Destination Revenue (Invoice/AR)”.
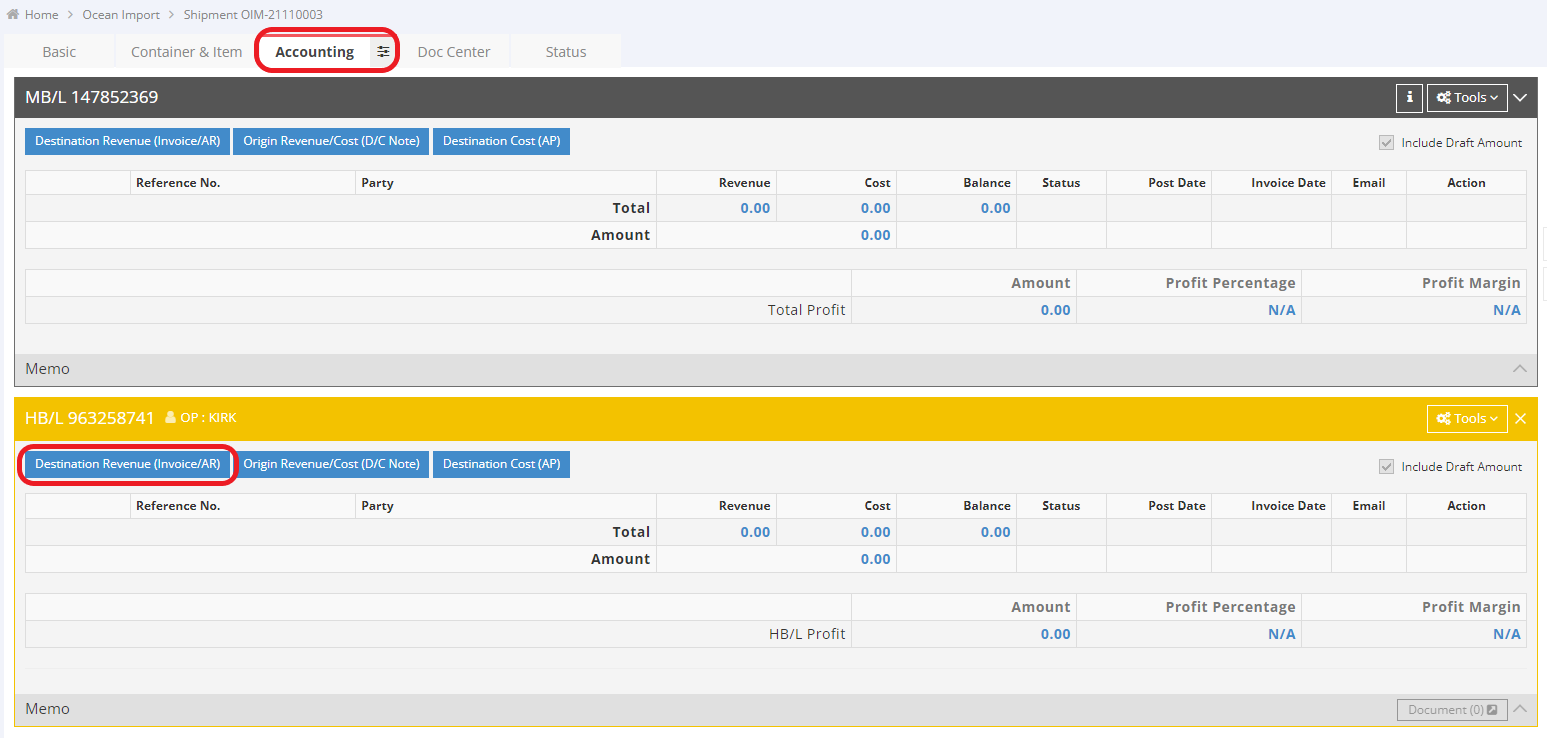
Note: We recommend creating AR invoices at the House Bill of Lading (HBL) level for the following reasons:
-
Clear customer association: The HBL usually represents the actual shipping client (e.g., the shipper or consignee), making it easier to associate each invoice with a single customer.
-
Charge allocation on the MBL level will be split: If you create an AR invoice at the Master B/L (MBL) level and the MBL contains multiple HBLs, the invoice amount will be distributed to each HBL based on the volume (CBM) ratio.
However, the system does not restrict you from creating AR invoices at the MBL level. You may decide whether to create them at the MBL or HBL level based on your actual business needs.
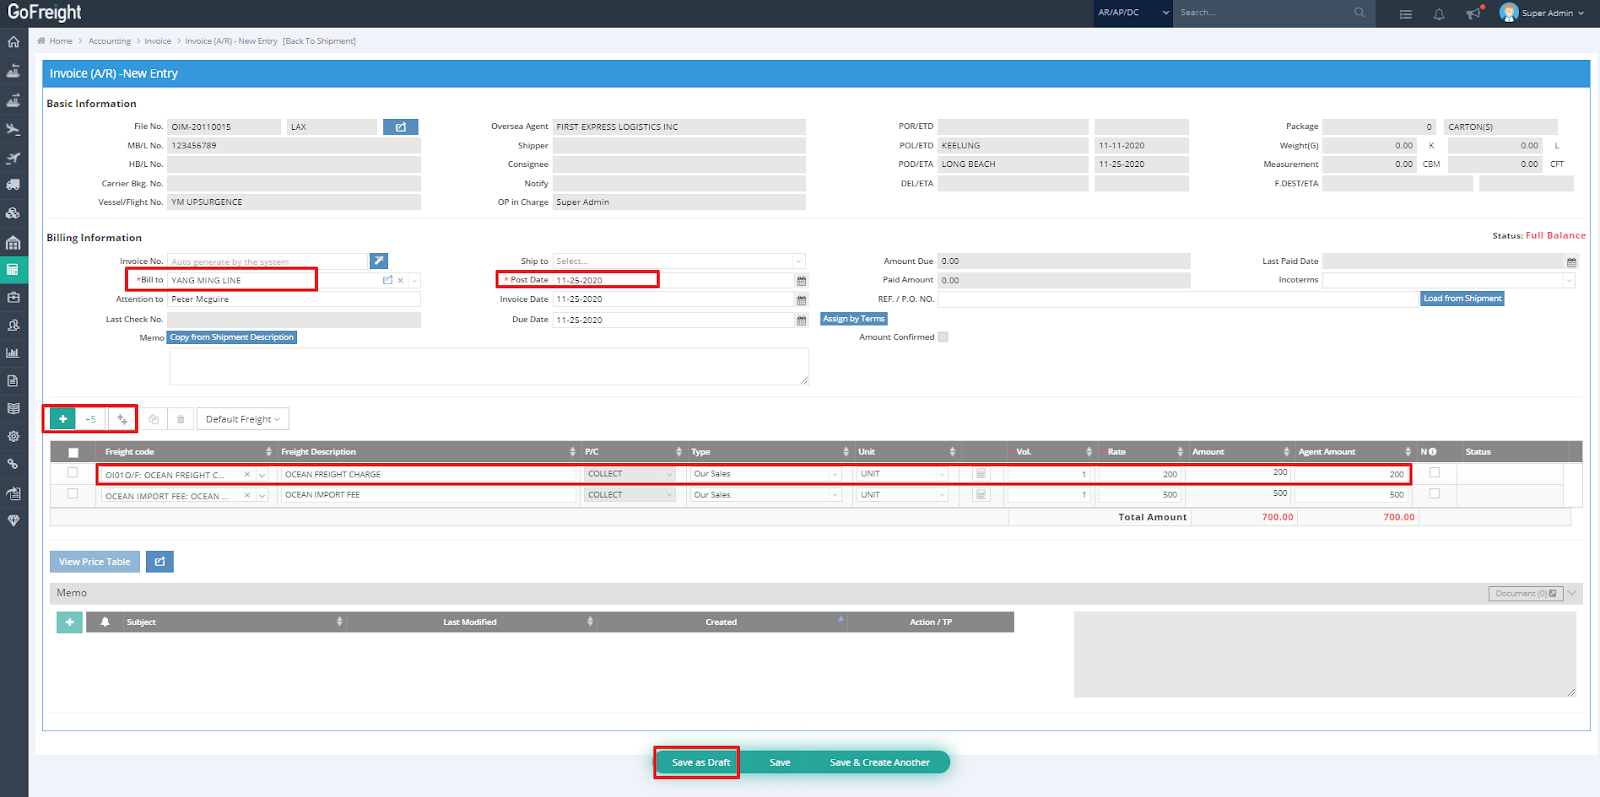
- Ensure the “Bill To” information is filled out, as it is required. By default, this field will populate with the “Bill To” information from your HBL.
- Review the Invoice Post Date. The system will automatically populate this field based on your default system settings. Just make sure the date reflects when you want to recognize this invoice—manual changes are usually not necessary.
- To add freight charges, click the green “+” button and enter the necessary details.
- In the “Type” column, specify whether the charge is “Our Sales,” “Collect for Agent,” or “Sales for Agent.”
- Enter the amount in the “Rate” field.
- When you're done, click “Save” to save the invoice. If some details are still pending and you prefer not to finalize them as a normal Invoice/AR yet, click “Save as Draft.”