Introduction: Managing Petty Cash in GoFreight
Petty cash covers those small, everyday business expenses not handled by regular checks or transfers. In GoFreight, we treat it like a dedicated "bank account". This lets you meticulously track every minor outlay—think office supplies or postage—ensuring accuracy and accountability. This guide will show you how to set up your petty cash account and record payments in GoFreight.
Steps to Set Up Your Petty Cash Account
First, create a specific bank account for petty cash in GoFreight.
-
Navigate to Bank List: From your GoFreight menu, go to "Settings" > "Accounting" > "Bank List".
-
Add a New Bank Account: Click the green "+" button.
-
Important Note on Permissions: Only users with Admin or General Manager roles have the authority to add or modify bank accounts in the Bank List. If your user role requires this permission, an Admin or General Manager user must approve it, and the GoFreight support team will then enable it for you.
-
-
Enter Account Details:
-
Bank Name: Type "Petty Cash".
-
G/L No. (General Ledger Number): Select "10300 Petty Cash".
-
Note: "10300" is GoFreight's default G/L Code for Petty Cash. If your company uses a different coding system, please use or create your specific G/L Code for Petty Cash.
-
-
-
Save Your Setup: Click "Save" to finish setting up your petty cash account.
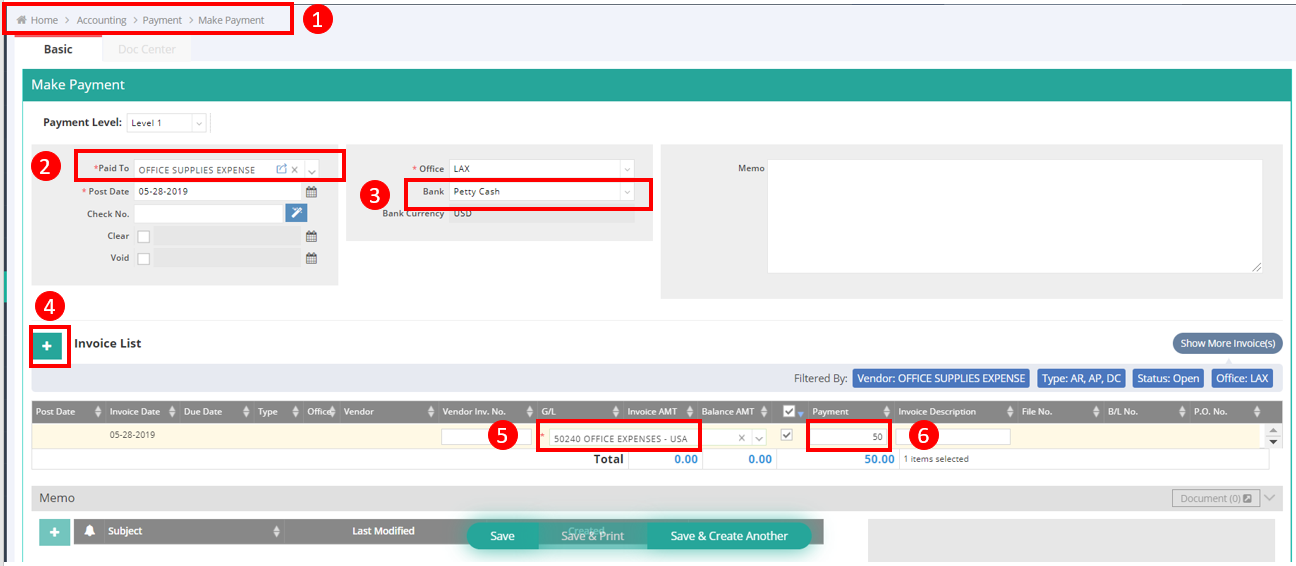
Steps to Make a Payment Using Petty Cash
Once your petty cash account is ready, you can easily record payments for various expenses. Here's how to process a payment using it:
- Access the Payment Module: Go to "Accounting" > "Payment" > "Make Payment".
- Select the Payee: In the "Paid to" field, choose the vendor you're paying. For example, if it's for office supplies, you'd select your "Office Supplies Expense" vendor. (You might need to create new vendors in the "Trade Partner" module first.)
- Specify Petty Cash as the Bank: In the "Bank" field, select "Petty Cash" from the dropdown.
- Add Payment Details: Click the green "+" button. You can link the payment to an existing invoice or add a transaction without an invoice (common for petty cash).
- Enter Expense Information:
- G/L Code: Enter the General Ledger code for the specific expense (e.g., "Office Expense").
- Amount: Input the exact amount paid.
- If you have multiple items, repeat this step for each.
- Complete the Transaction: Review all details for accuracy, then click "Save" to record the payment.