There are two features on GoFreight that support creating your invoices, namely billing-based feature and invoice-based feature.
The initial setting of your machine will be Invoice Based. If you would like to enable Billing Based, please kindly contact our support team at: support@gofreight.com .
Once the Billing Based feature is enabled, you can find the hamburger icon next to the Accounting Tab in your shipment file. Click on it to see the selection list and select Billing Based.

Here, we demonstrate how to create your revenue billing items as an example. The operation to create the cost billing items is the same as the following instructions.
Click on the green + button to add a new line in the Revenue section.

Input the mandatory field marked red asterixis, e.g. Bill To, Freight Code, Volume, Rate, and Save. If you cannot find the Freight Codes (= Billing Code) that you would like to apply, please contact your Admin or General Manager users to add them for you. If you’re Admin or General Manager, or you’re the user who has one of these two roles, please consult your CPA, before adding. Regarding how to add or edit these codes on GoFreight, please refer to the appendices at the end of this article for more user articles and tutorial videos.

After saving your file, the Invoice No. will be generated automatically by following your system settings.

To view this invoice, please click on the blue arrow icon next to the invoice number. The system will create a new tab page to bring you to the invoice details.
You may also have a quick view of the balance of this invoice when your cursor moves over this blue arrow icon.

If you add a new billing item line with the same Bill To party, the system will merge them into the same invoice. On the contrary, if you create another line with a different Bill To party, the system will generate a new invoice automatically.

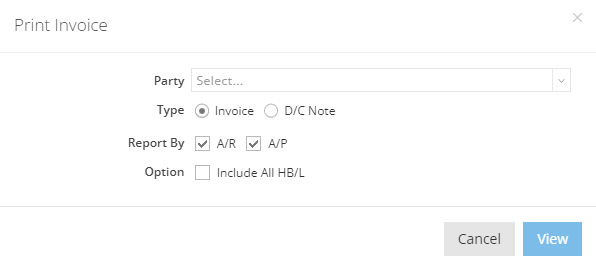
To print your invoices, please click on the “Tools” at the upper right corner of this shipment file, and select “Print Invoice”.

On this "Print Invoice”, select your invoice party, type, Report By, and Option. Then click on “View”.
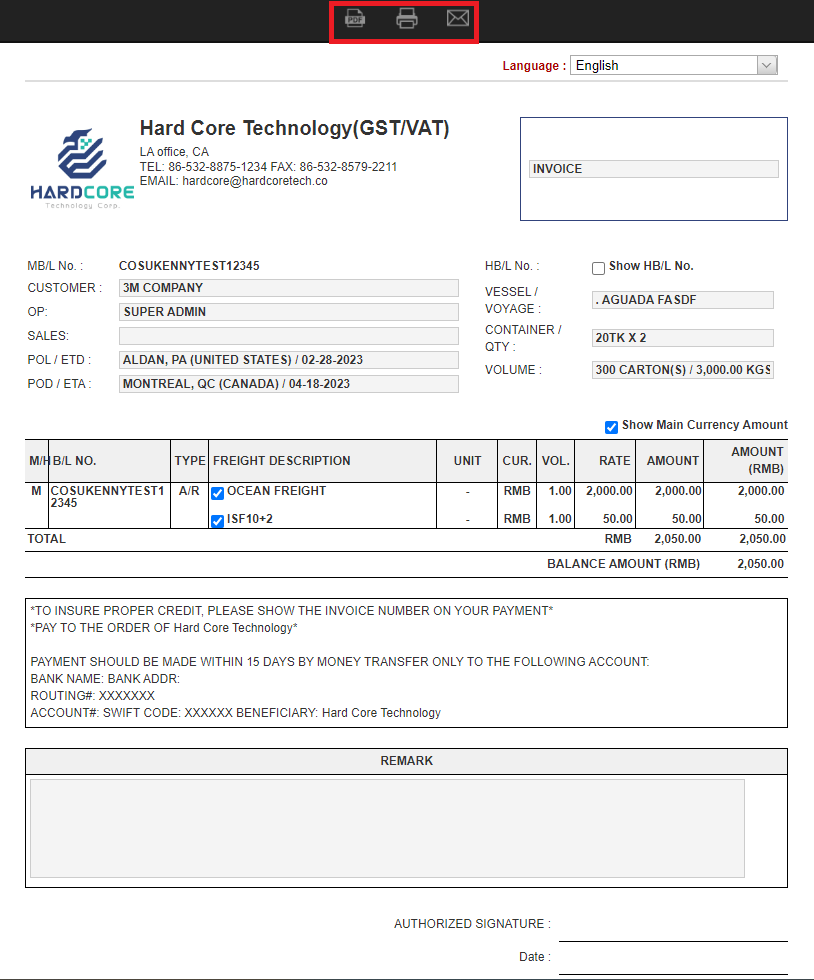
On this printing preview page, you are able to click on the three buttons on the top of the page to download, to print out, or to email this invoice.
If you would like to save this invoice as your template, select the billing item lines which you would like and click on the “Save as Template” button to pull out the AR Billing Module setting pages.

Input your template’s name and click on the green tick icon to save your template’s name and description.

Before you Save or Apply your template, you still can modify the template details, e.g. creating a new billing item, selecting other party types, and etc..

Next time, when you would like to create new revenue invoices, you can simply click on “Load from Template” to select and apply templates which you have already created.

After applying the template, you only have to select your Bill To Party and Save. Then your invoice is done.

One last thing, please be aware that the template is saved as user preference, other users won’t be able to use your template.
Appendices: relevant articles and tutorial videos