This guide explains how to use the Document Sync function in GoFreight to share shipment-related documents with your customers through the customer portal, without the need to send emails.
Step 1: Manage Document Auto-Sync Functionality
To manage document security, you can configure whether a document is:
- Auto-Synced – When a document is generated, the system will automatically sync the document for Tracking users to view.
- Can Synced – When a document is generated, the user can manually choose whether to "Sync to Tracking" for Tracking users to view.
- Can’t Synced – When a document is generated, it will be restricted from syncing to the Customer Portal and cannot be shared with Tracking Users.
Refer to the following system-generated documents and contact Customer Support to specify the desired sync settings.
- Ocean Import
- HBL: ACE
- HBL: Arrival Notice
- HBL: Commercial Invoice
- HBL: Customs Release (3461)
- HBL: Delivery Order
- HBL: Entry Summary
- HBL: HBL Print
- HBL: Packing List
- HBL: Proof of Delivery
- HBL: Release Order
- ISF Confirmation
- Invoice (Only customer can view)
- Export
- HBL: Booking Confirmation
- HBL: Commercial Invoice
- HBL: HBL Print
- HBL: Packing List
- HBL: Pre Alert
- HBL: SLI/SED
- HBL: Shipping Advice
- Invoice (Only customer can view)
Step 2: Generate Documents in GoFreight
- Access the Shipment Page
- Log into GoFreight and navigate to the Shipment Page.
- Locate the Documents You Want to Generate
- Scroll to the HBL section.
- Click on the Tools button to access a list of default documents.
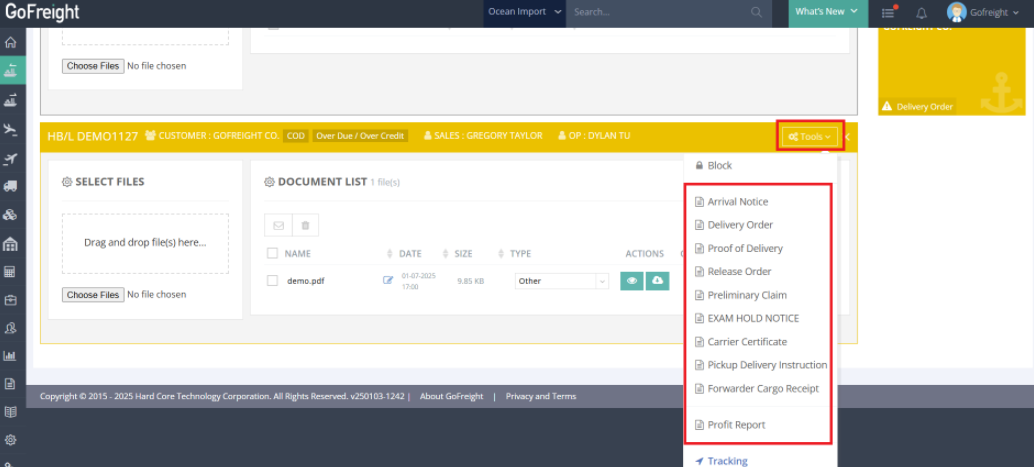
- Add Documents to the Document List
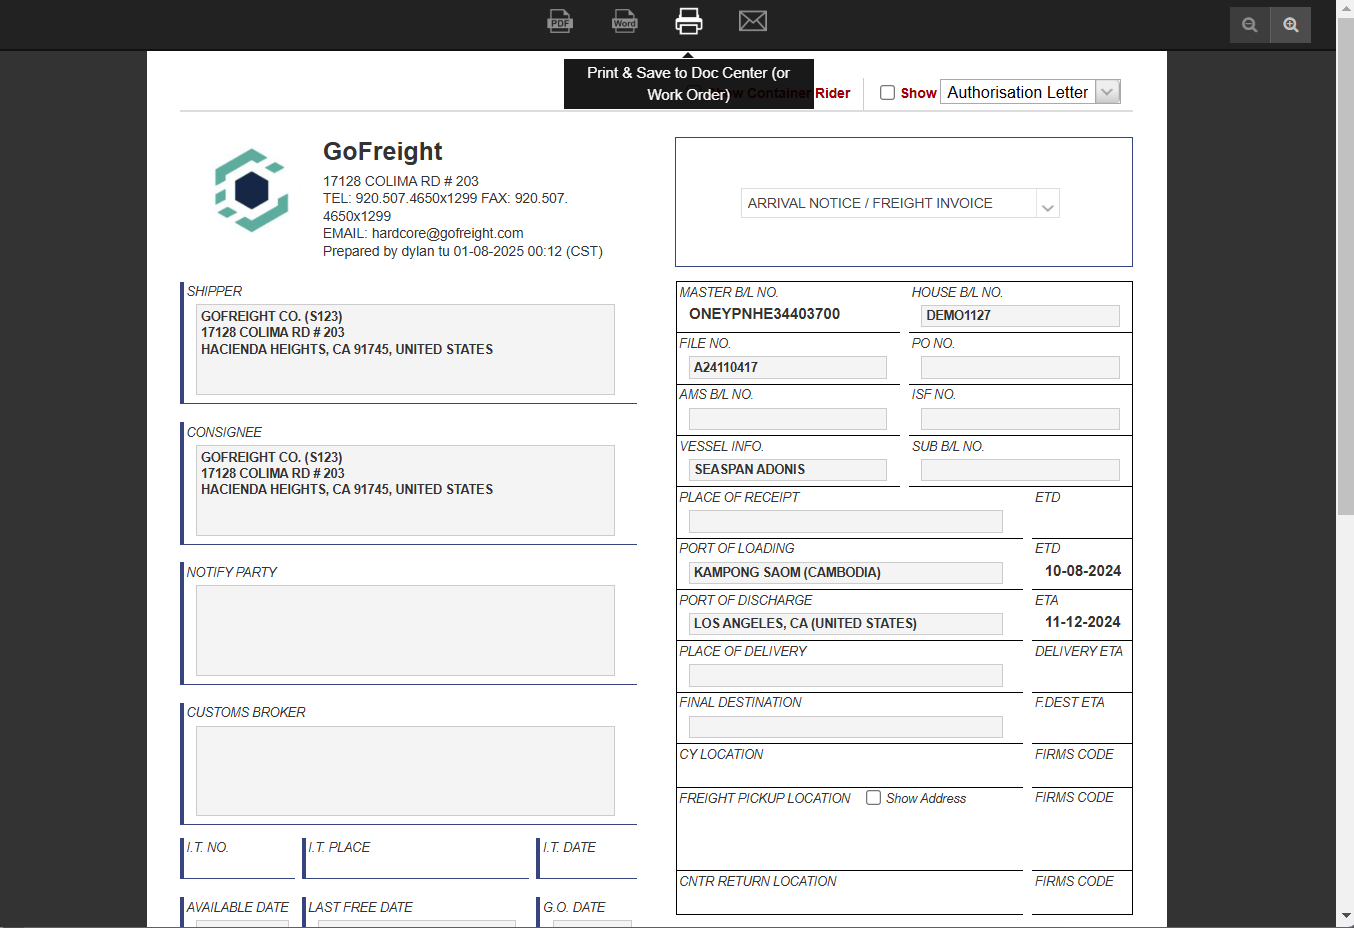
- Select the desired document (e.g., Arrival Notice).
- A print preview will open. Click the printer icon labeled Print and Save to Doc Center.
- Close the printing tab. The document will now appear in the document list.
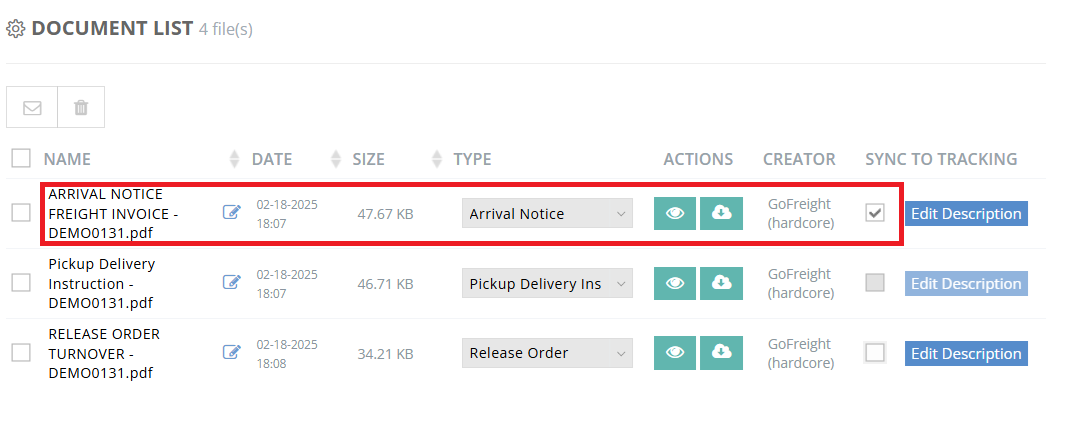
- Preview or Print Documents
- Use the document list to preview or print the synced document.

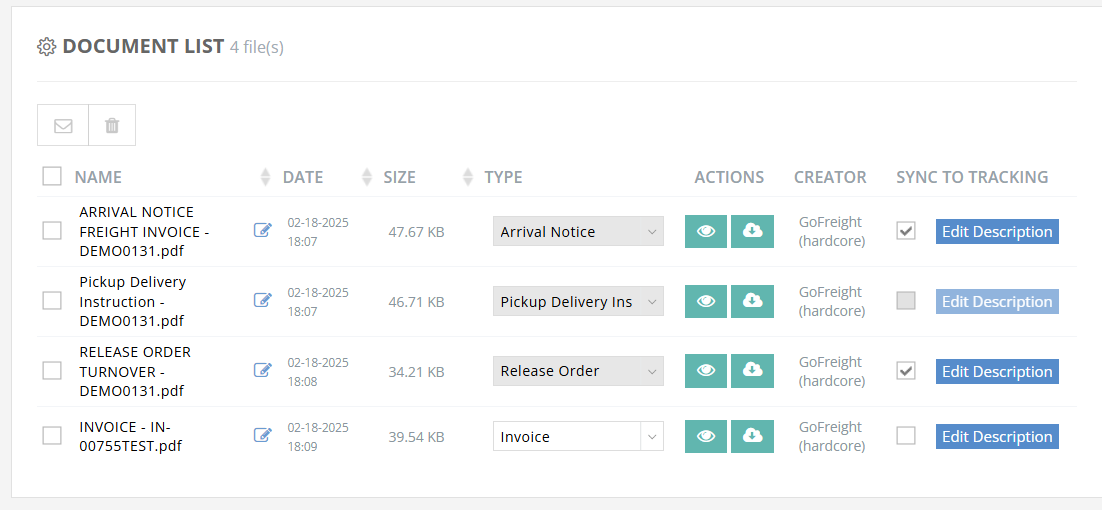
- Document Syncing Status
After a document is created, its syncing status will follow the pre-configured sync rules:- Auto Sync:
If you have chosen to auto-sync the Arrival Notice, the "Sync to Tracking" box will be automatically checked upon document creation.
- Auto Sync:
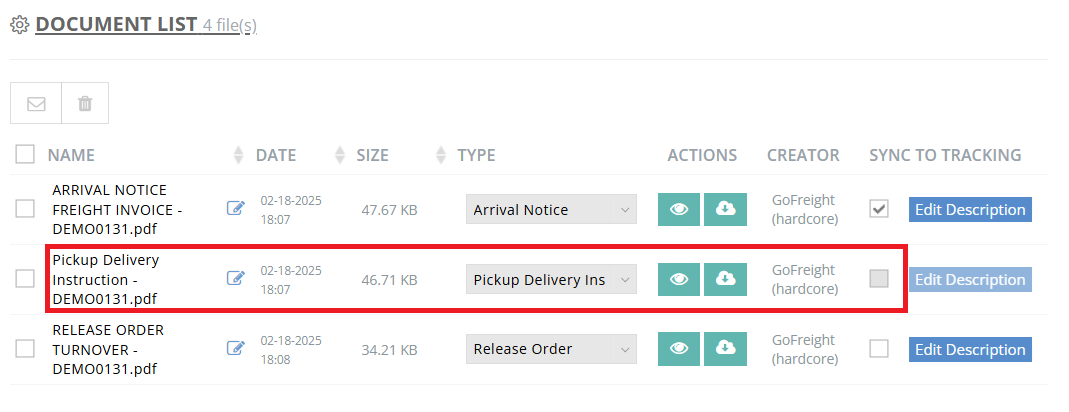
- Can Sync:
If you want to manually control syncing, set the document type to "Can Sync." The "Sync to Tracking" box will remain unchecked by default but can be selected as needed.
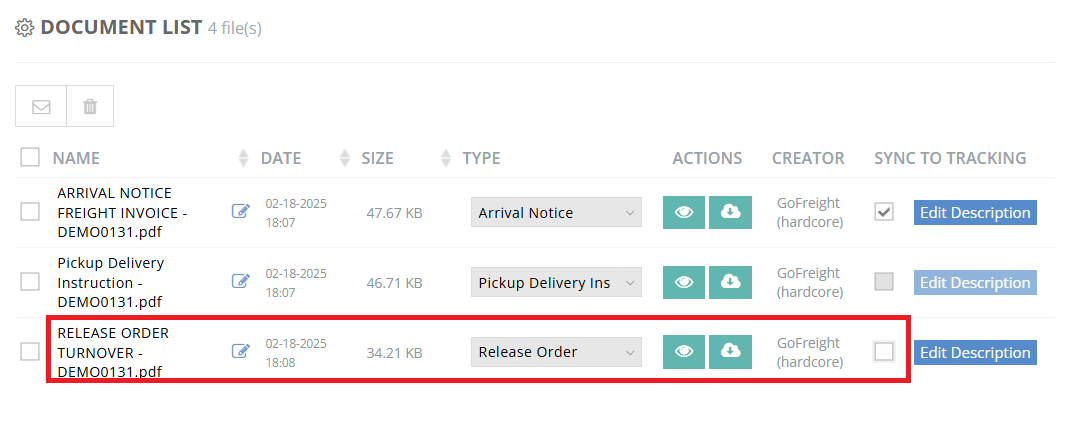
- Can’t Sync:
To keep certain documents for internal use only and prevent syncing to the customer portal, set them to "Can’t Sync." The "Sync to Tracking" box will be grayed out and unavailable.
- To adjust your auto-sync settings please contact Customer Support.
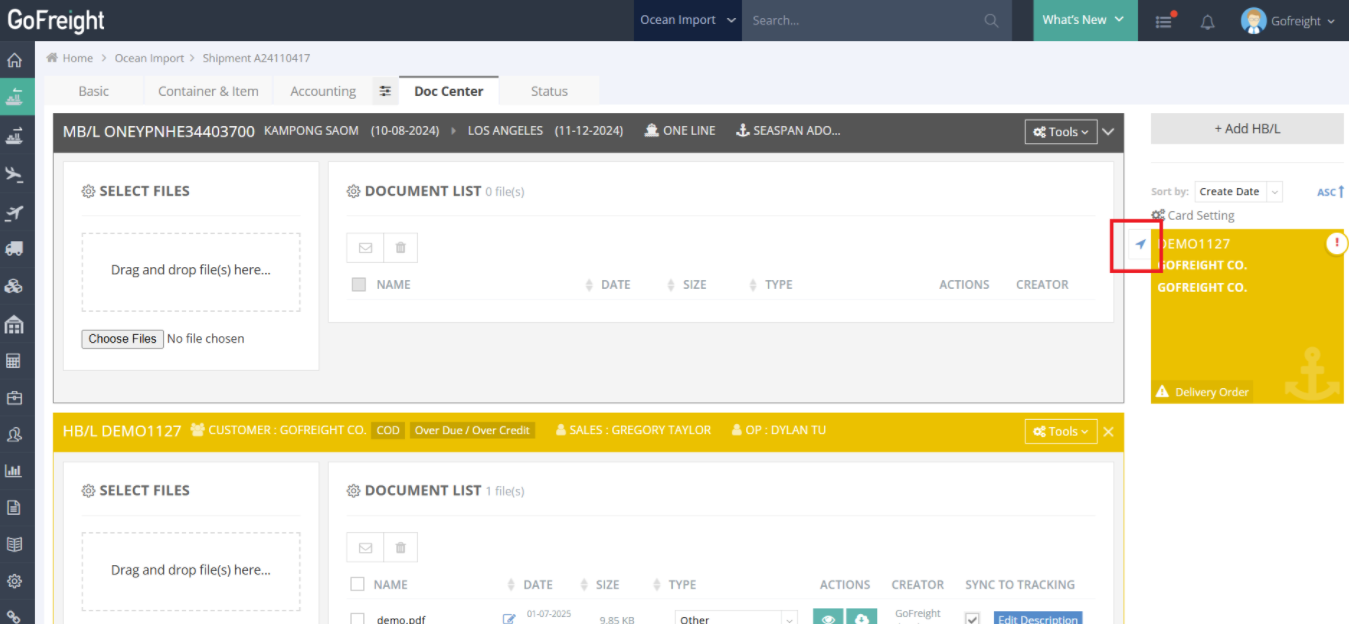
Step 3: Check Documents on the Customer Portal
- Open the Customer Portal for the Shipment
- Click the blue arrow on the right-hand side, next to the HBL tab, to access the customer portal.
- View the Synced Document
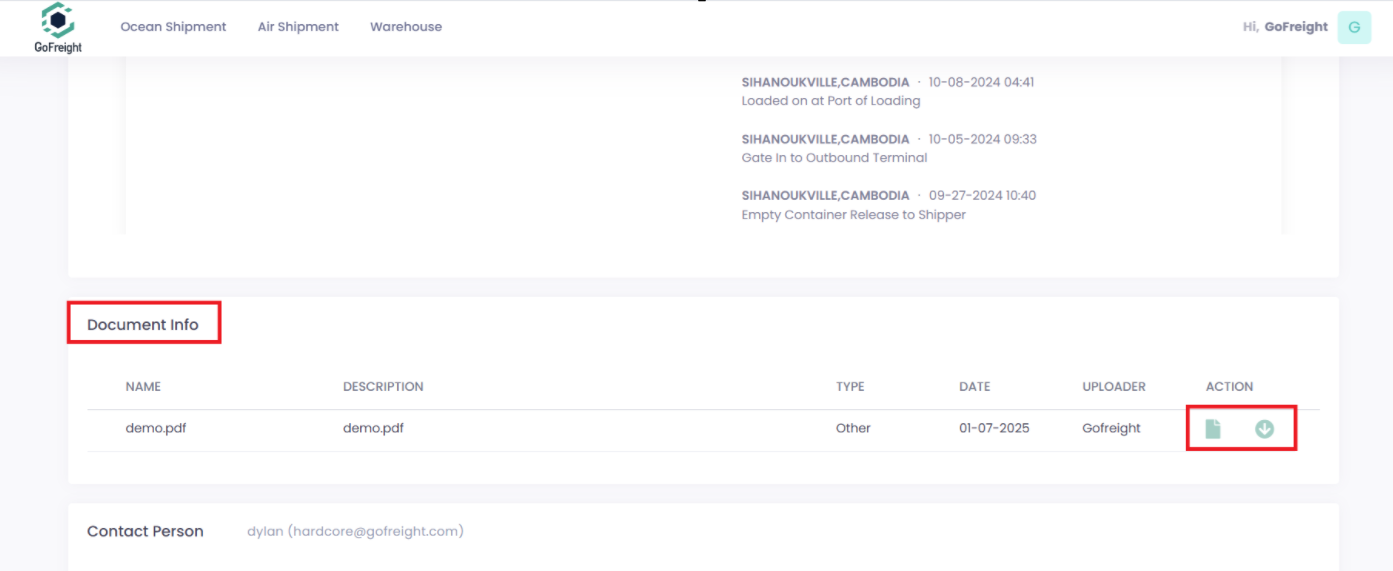
- Scroll to the bottom of the customer portal shipment page.
- Synced documents will appear in the Document Info column. Customers can view or download these documents.
- Invoice Document Access Restriction
- To protect sensitive information, Invoice documents are only visible to tracking users with the "Customer" role.
- To adjust tracking user roles, please refer to Tracking User Management
Step 4: Stop Displaying a Document
If you want to stop displaying certain documents in Doc Center:
- In your Doc Center HBL section.
- Uncheck the Sync to Tracking box for the document you want to stop from displaying.

Additional Information:
- Invoice Document Access Restriction
- To protect sensitive information, Invoice documents are only visible to tracking users with the "Customer" role.
- To adjust tracking user roles, please refer to Tracking User Management
-
How to Sync Your Uploaded Files to the Customer Portal?
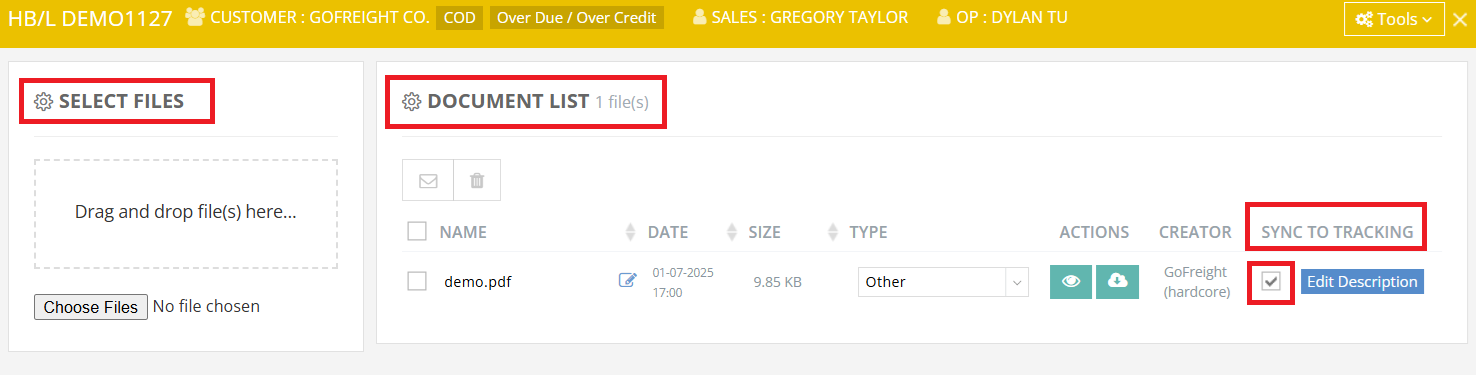
In addition to creating documents in GoFreight, you can also upload PDF files in the HBL section.
- Select and upload a PDF file in the HBL section.
- The document will appear in the document list on the right-hand side.
- Locate the Sync to Tracking column in the document list.
- Check the box for the document you want to display on the Customer Portal.

For a visual guide on this feature, please refer to the following videos:
FAQ
Q: If I enable a tracking portal user to see the Doc Center, will they only see the Doc Center of the section where they are listed as a customer?
I.e. on the HBL Section but NOT the MBL doc center, when listed in the HBL?
A: Currently, only documents uploaded to the HBL are visible to your trade partners. On the same HBL, the shipper, consignee, and customer can all access the documents uploaded to the HBL. However, the invoice is restricted and only visible to the customer.