This guide explains how to configure customized shipment reports for Ocean Import and Ocean Export shipments.
Permission
- By default, only General Managers and Operation Managers can configure these settings. To modify permission access, please contact Customer Support.
- Users may select templates created by other users, but can only view fields they personally configured. Fields configured by others are not visible and cannot be changed.
Two-step Setup:
1️⃣ Design the Report Template
2️⃣ Set Up the Report for Tracking Users
Step 1: Design the Shipment Report Template
1-1 Navigate to Template Settings
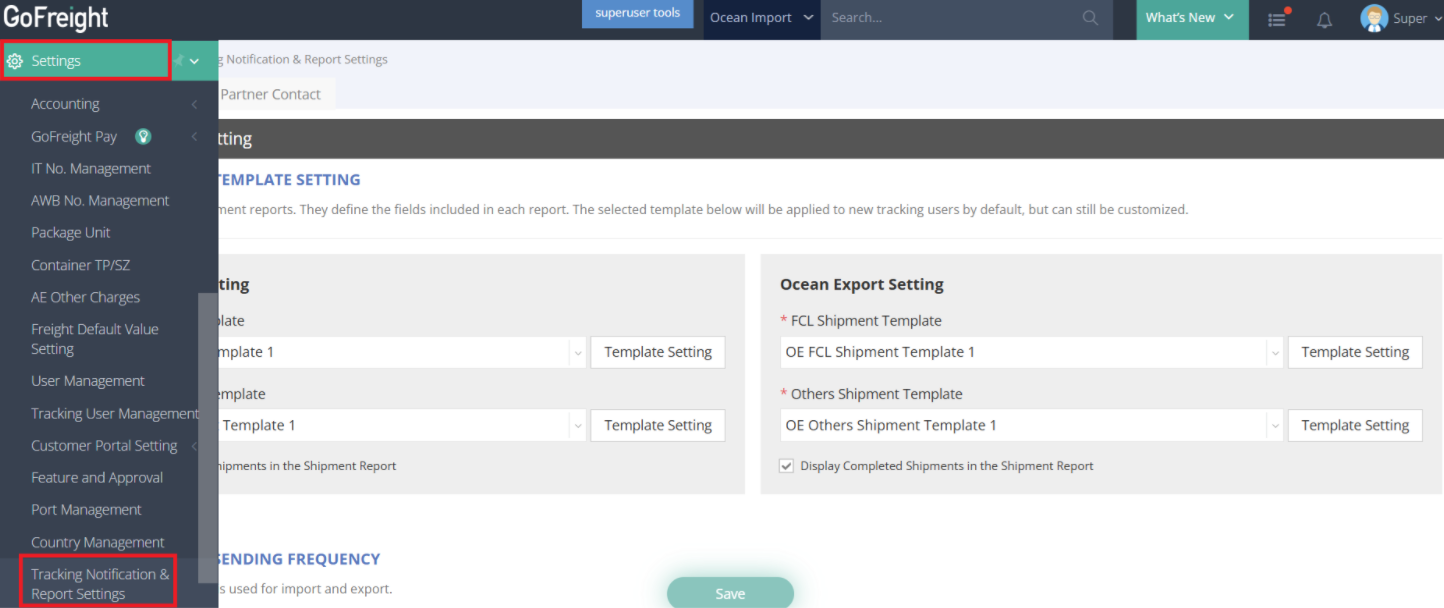
- Go to Settings
- Select Tracking Notification & Report Settings
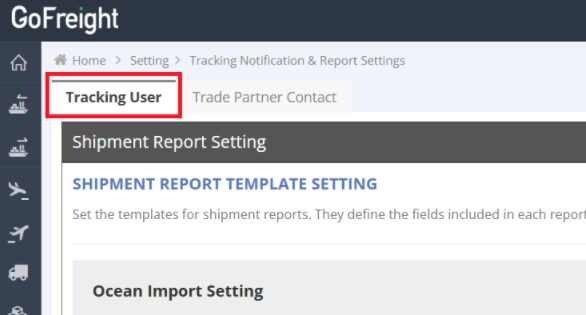
- Click Tracking User
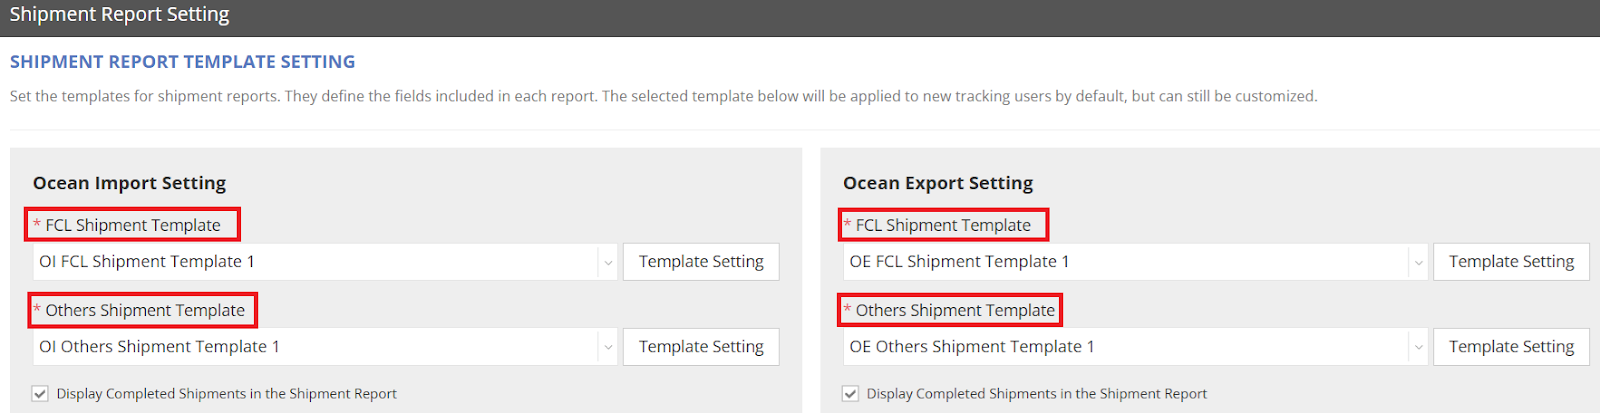
****Note: Ocean Import and Ocean Export each include two templates: FCL Template and Others Shipment Template. These templates are separate and cannot be used interchangeably.
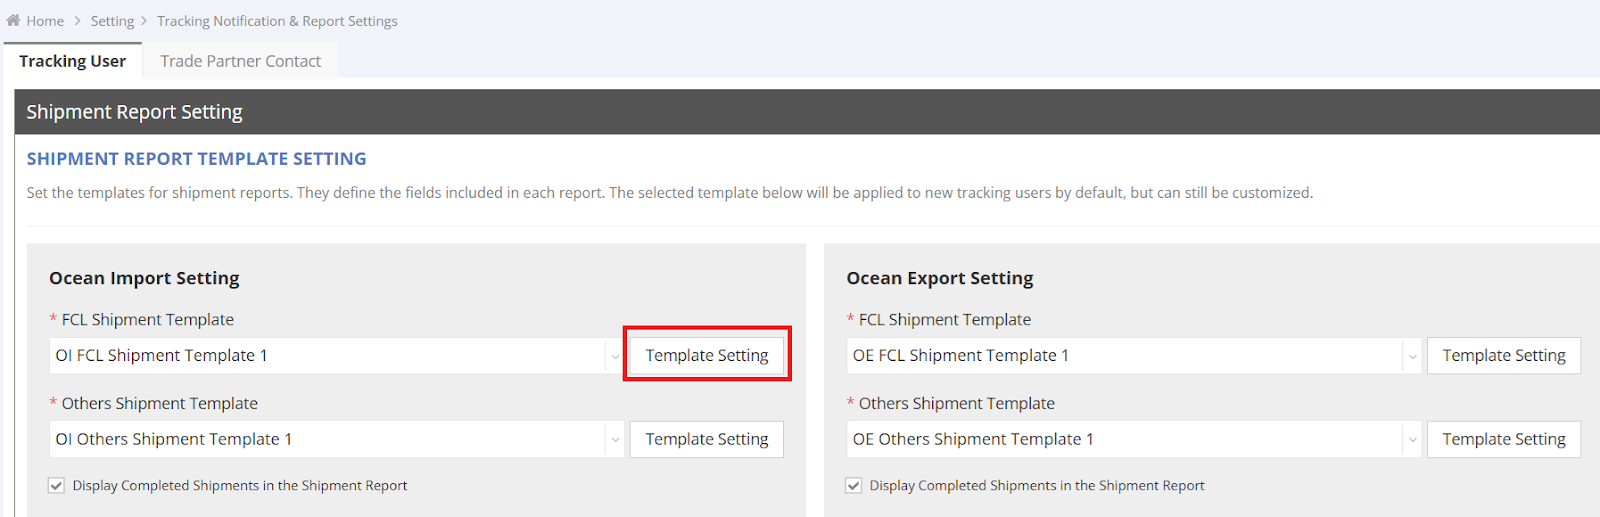
1-2 Open Template Setting
- Locate the template section (FCL or Others).
- Click “Template Setting” on the right side.
- A pop-up window will appear for customizing data fields.
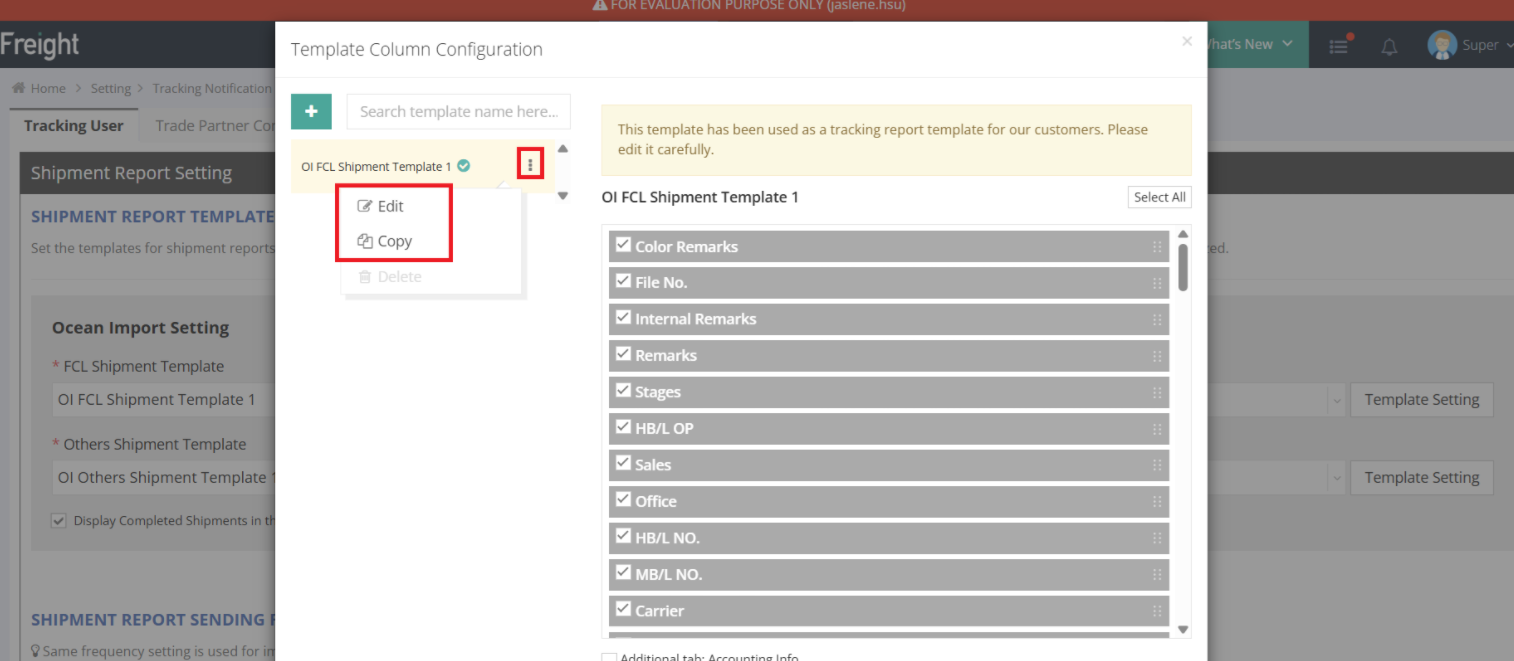
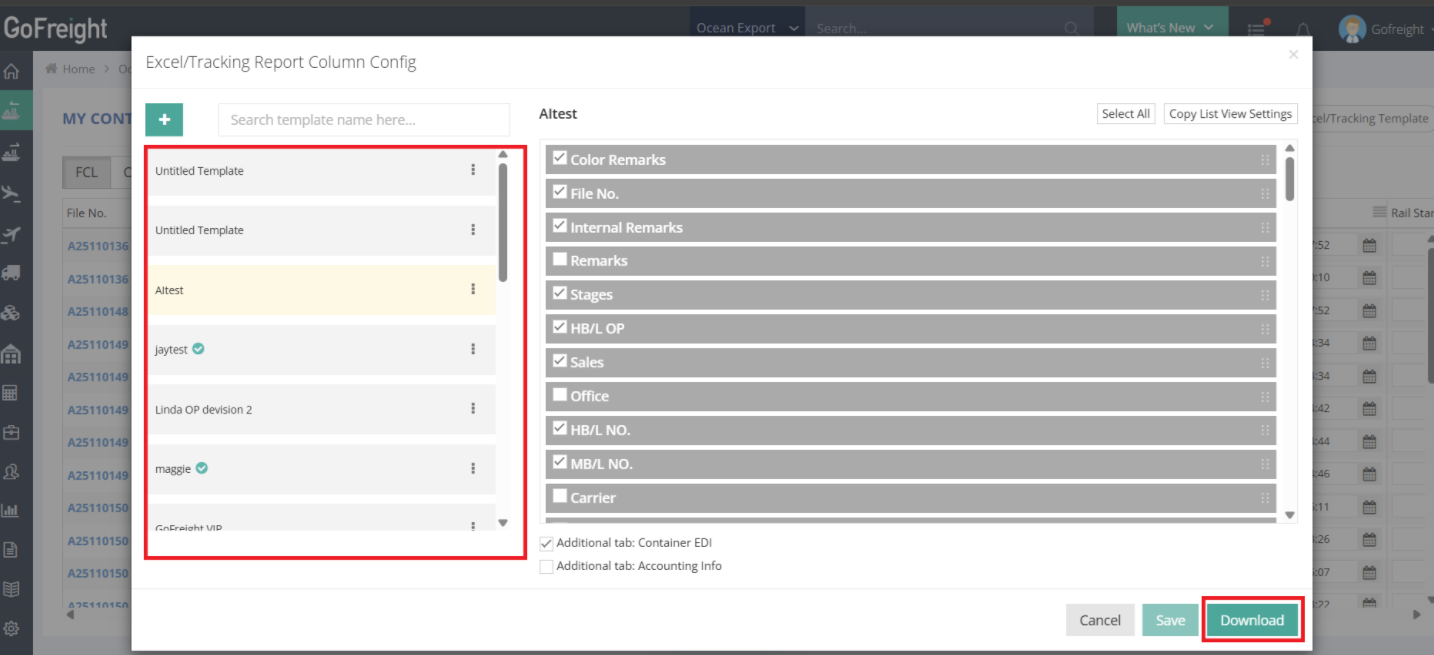
1-3 Create and Edit Templates
- Click the green “+” icon (top-left of the pop-up) to create a new template.
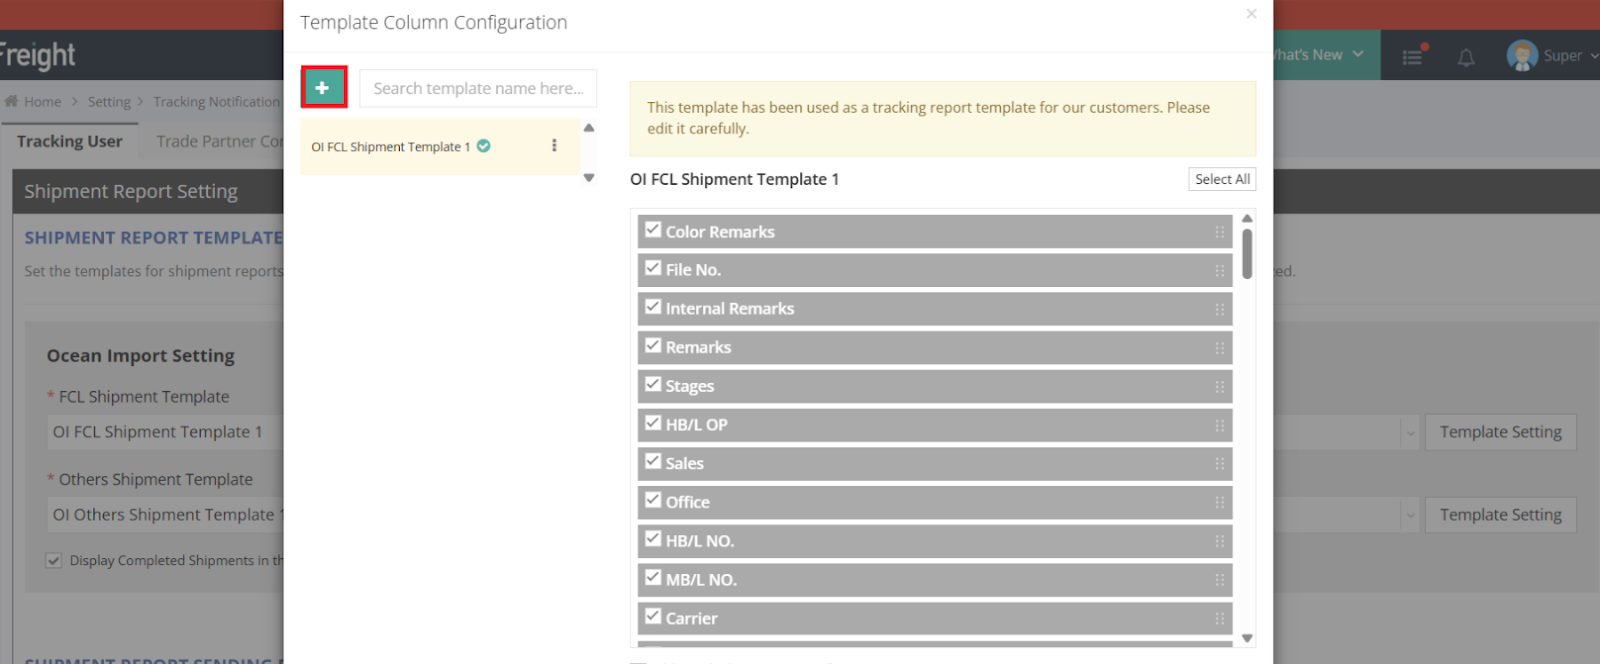
- Click the three dots next to a template name to rename it for easy identification.
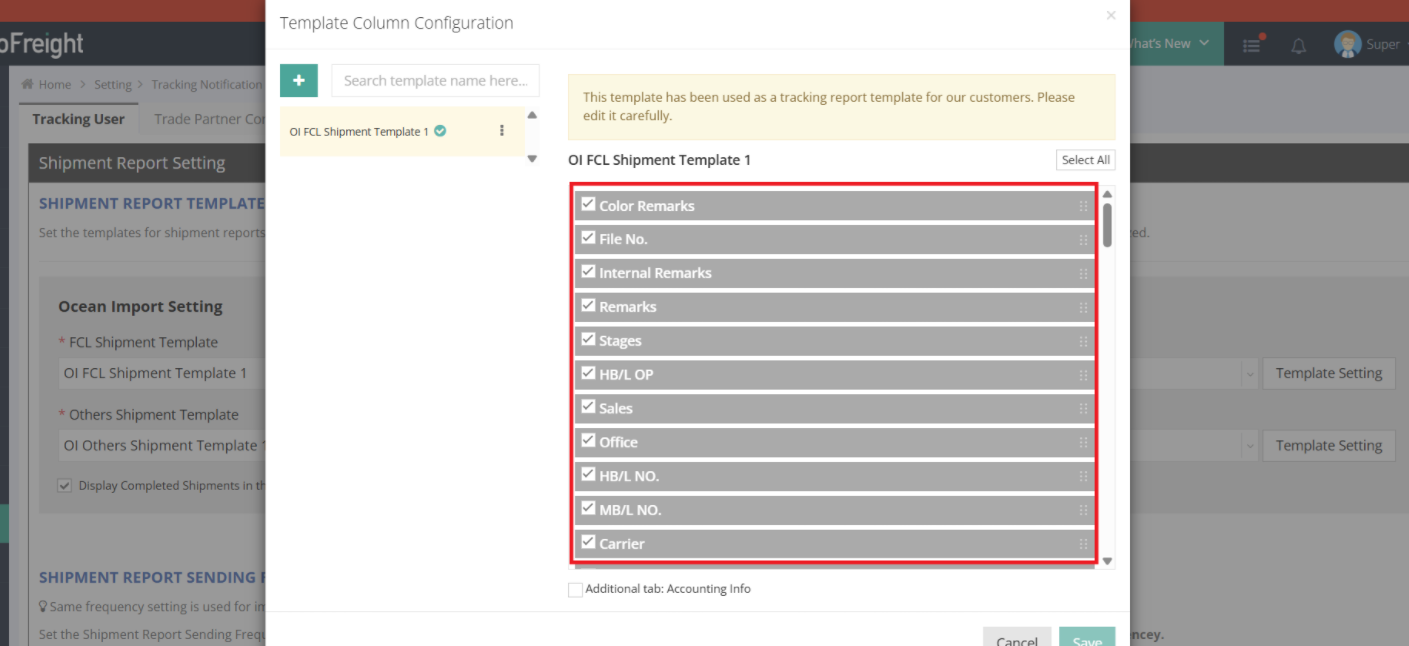
1-4 Customize Data Fields
- Check or uncheck fields on the right side to include them in the report.
- Drag and drop fields to adjust the order.
- Click Save in the pop-up window when finished.
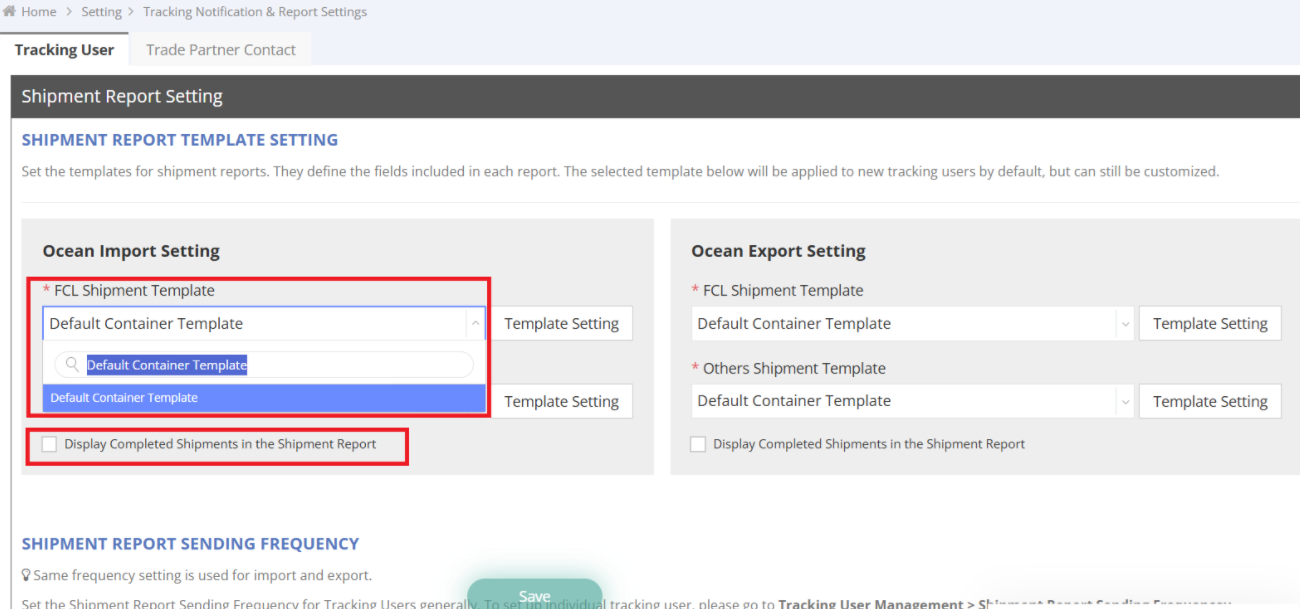
1-5 Set a “Default Template” for New Tracking Users
- Below the template settings, choose whether to set a “default template” for all newly added Tracking Users.
*** Important: Templates configured on this page will become the default template for all newly created Tracking Users.
***Please ensure company-wide alignment before making changes.***
- Optionally check Display Completed Shipments in the Shipment Report to include completed shipments. For more details, please refer to Understanding the “Complete Shipment” Function in the Tracking System
- After adjusting settings, click Save on the main page again.
Step 2: Set Up the Report for Tracking Users
2-1 Access Tracking User Management
- Go to Settings > Tracking User Management.
- Select the Tracking User you want to configure.

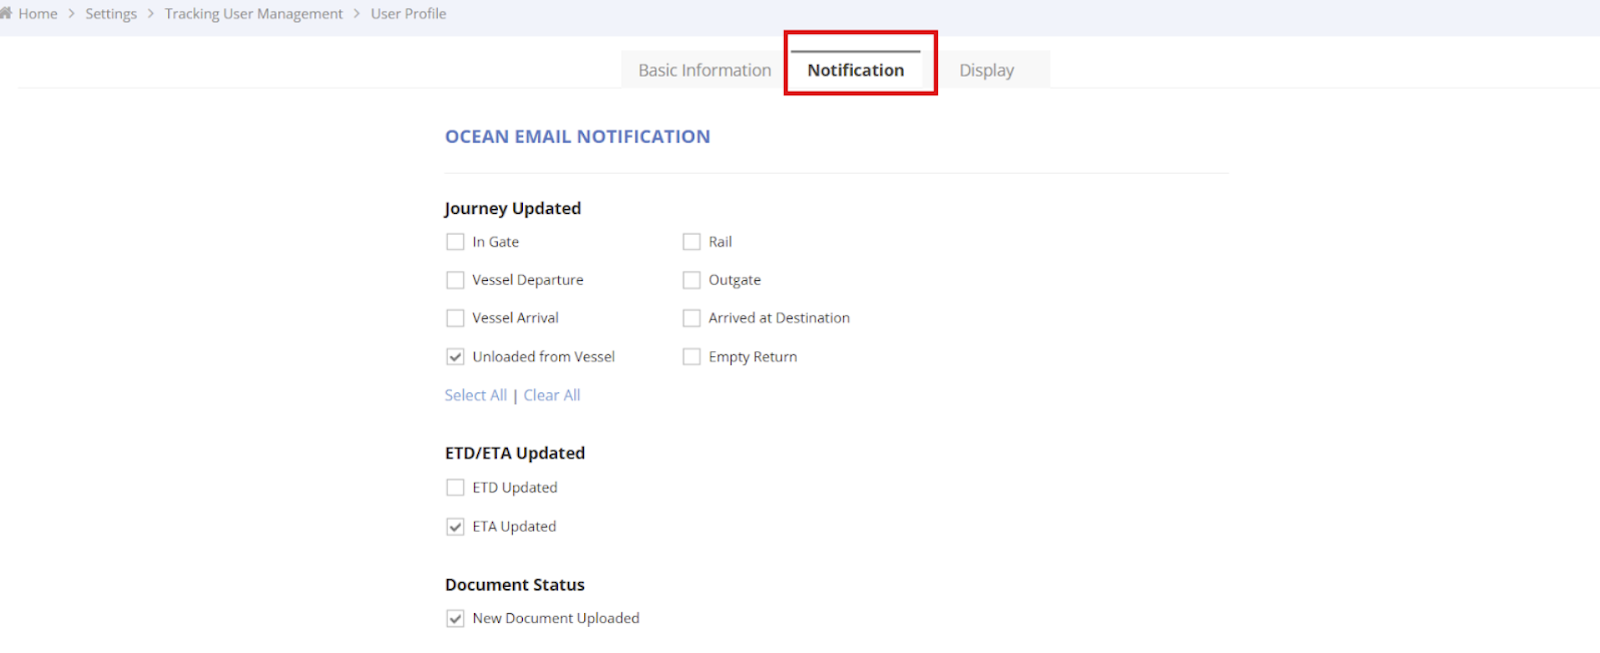
2-2 Configure the User's Shipment Report
- Go to the Notification tab.
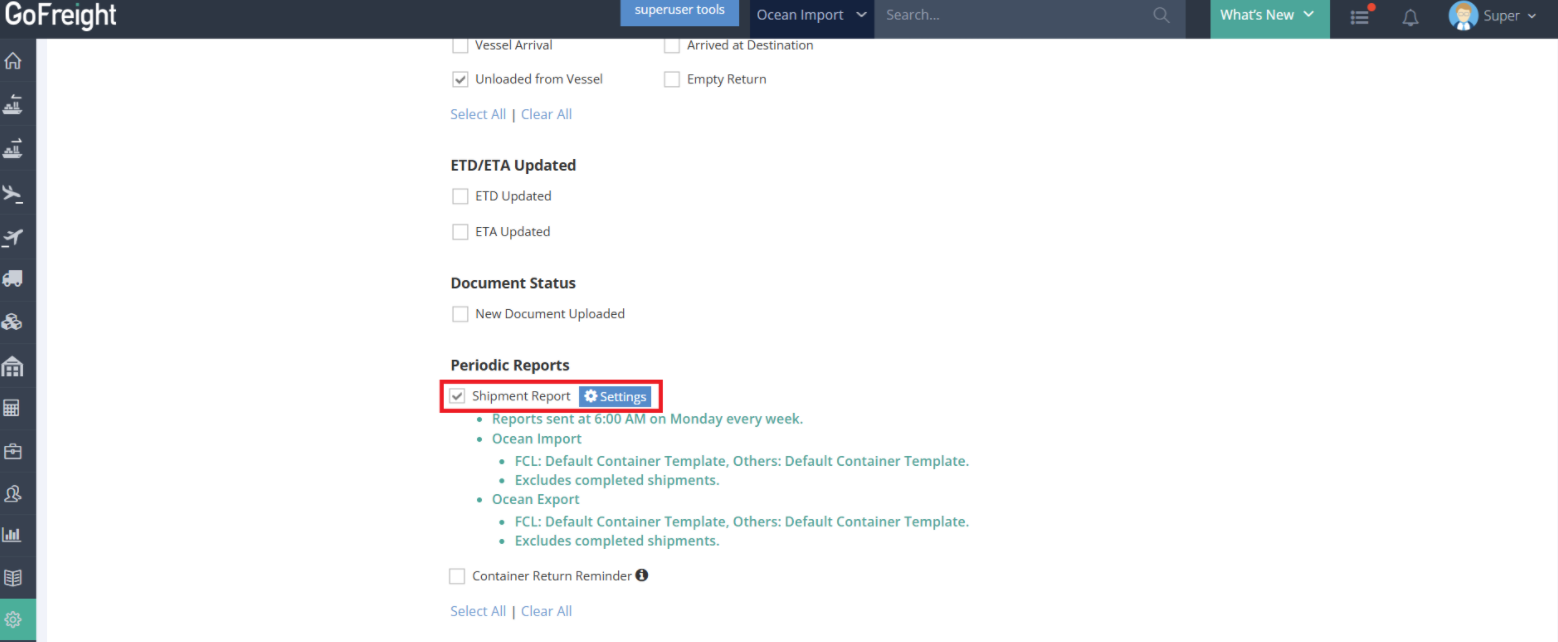
- Under Periodic Reports, check Shipment Report.
- Click the settings icon next to it (a pop-up window will appear).
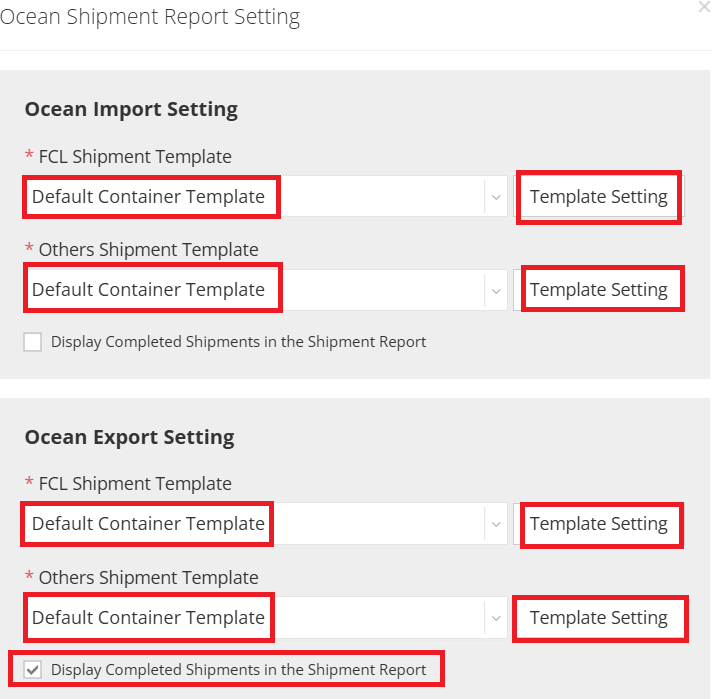
2-3 Assign the Report Template
- For each shipment type (FCL / Others), select the appropriate template from the dropdown menu. (The default shown is the one you configured in Step 1.)
- Optionally check Display Completed Shipments in the Shipment Report. (To learn more about completed shipments, please refer to Definition of Complete Shipment .)
- If needed, you can click Template Setting here to create or edit templates directly.
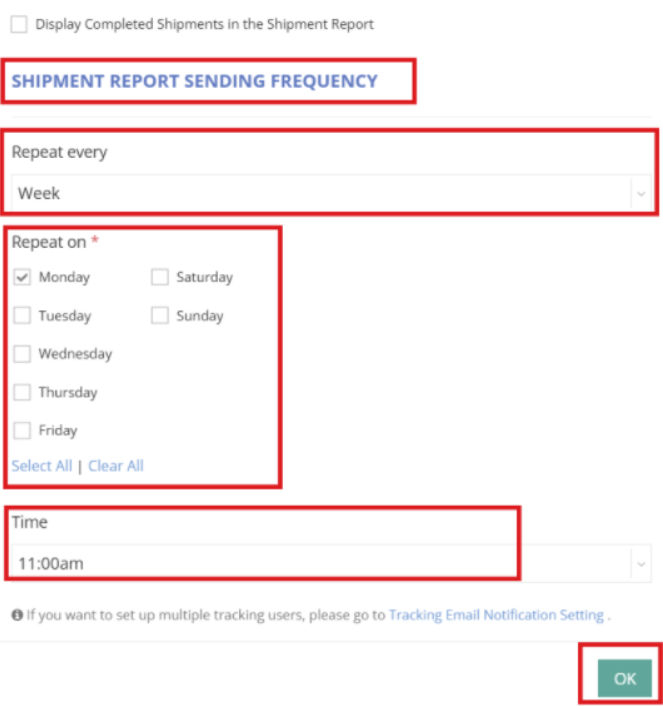
2-4 Set Report Sending Frequency
- Choose Weekly or Monthly.
- Specify the day of the week and time.
- Sending timezone follows the GoFreight system timezone (typically your office timezone). Adjust accordingly for the user’s location.
- Click OK, then SAVE again on the main page.
After setup is complete, the system will automatically generate an Excel shipment report and deliver it to your customers based on the configured schedule
Downloading a Sample Template for Reference (Optional)
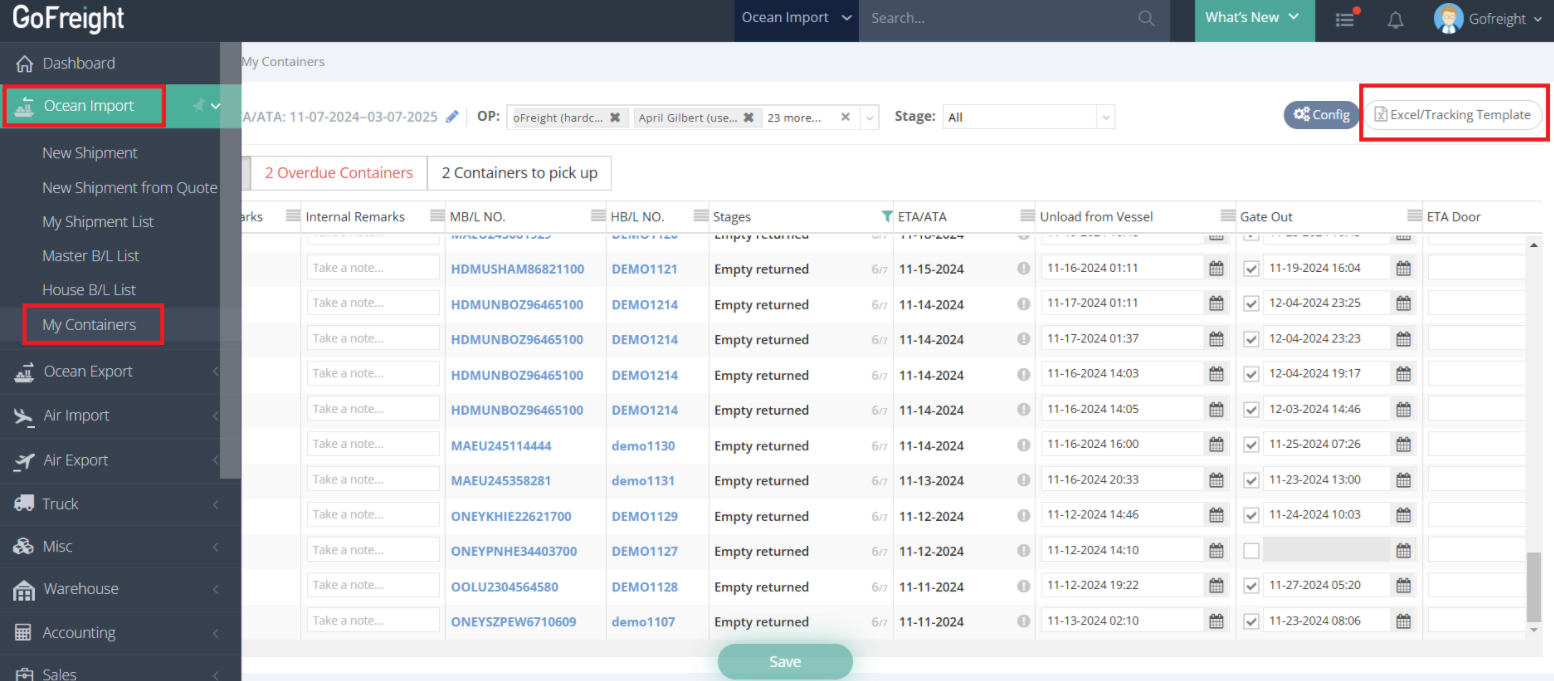
If you need a template sample to review or share with a customer, you can download one using the My Containers page:
- Navigate to My Containers under Ocean Import.
- Click the Excel/Tracking Template button located in the top-right corner. A pop-up window will appear for customizing data fields.
- On the left side, select the template that you want to preview.
- Download the sample file for reference.
FAQ
Q: How is the weekly Shipment Status Report sorted? Why does the shipment order change from week to week?
A:
The weekly Shipment Status Report is sorted by ETA (Estimated Time of Arrival) in ascending order, meaning shipments with earlier ETAs appear first.
This sorting logic helps users easily prioritize shipments that are approaching arrival.
Therefore:
-
For any given week:
The report reflects the shipment list sorted by the current ETA order in the system. -
When new shipments are created between reports:
Newly added shipments are inserted into the list based on their ETA, rather than being placed at the end.
As a result, new shipments may appear in the middle of the list if their ETA falls between existing shipments.
Q: When I download the report template from My Containers, it includes shipments across multiple consignees and customers. For a scheduled shipment report assigned to a tracking user, will the report also include shipments that do not belong to that user?
A:
To clarify, the report you downloaded from My Containers is only a report template. At this stage, it has not been configured to any specific tracking user, so it displays all containers under your operation, it’s essentially for you to review the format and layout before applying it to tracking users.
Once the template is configured for a tracking user, the system will filter shipments based on the roles set in the HBL that match the tracking user’s role. For example, if a customer is set as “Consignee” in its tracking user settings, the report sent to them will only include shipments where this customer appears in the consignee field on the HBL.
For a visual guide on this feature, please refer to the following videos: